Our Bright, White Kitchen Remodel – Three Daughters Home

I can't wait to walk you through our amazing kitchen transformation! Keep reading, and if you like this post and want to see more home projects & DIYs, check out my blog site and subscribe! You'll also receive my 'Top 10 Tips for Refreshing a Space' as a thank you for subscribing!
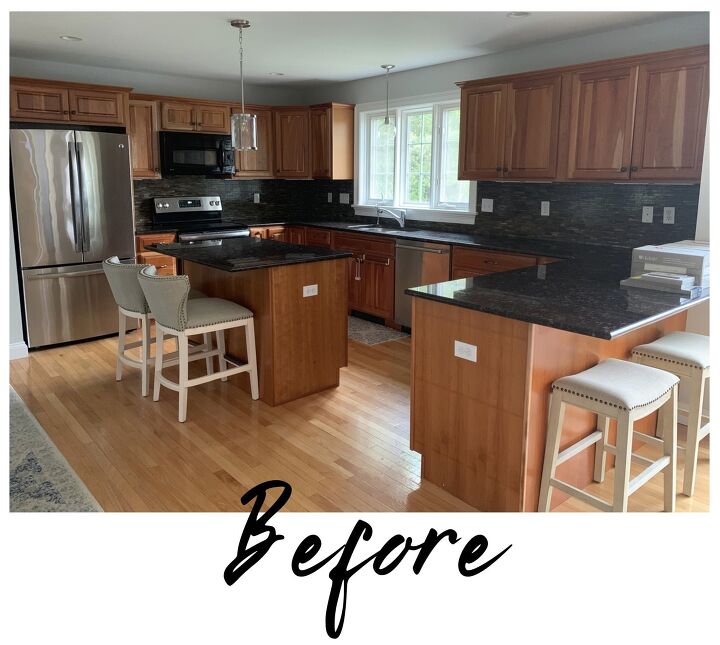
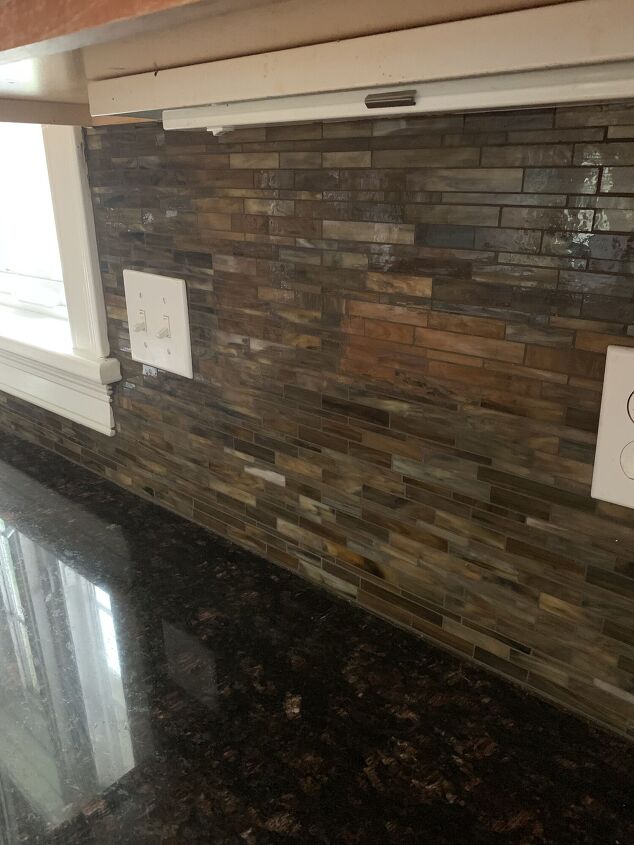
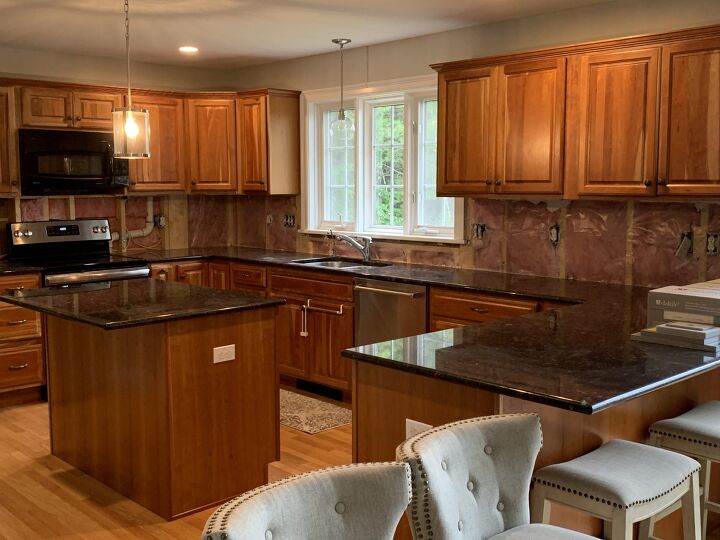
When my husband and I first walked our house, one of my first thoughts was, “If we buy this house, the kitchen has got to be updated.” Not that it was horrible; it just wasn’t my taste. It was brown on brown on black — brown cabinetry, brown flooring, black/brown countertops and black/brown backsplash (say that 3x fast). It was so dark and in desperate need of lightening up. Knowing kitchens and bathrooms are the most expensive rooms to remodel, we didn’t plan on re-doing the kitchen right away. But as we evaluated the projects we wanted to do, a kitchen remodel made the most sense because of its added resale value to the house. So for our very first big home project, we decided to go big or go home!
Getting Started
Before you start any major project, definitely do your homework. Get multiple quotes and make sure any company you hire is legit with good references. My advice is don’t go with the most expensive quote, but don’t go with the lowest quote either. Get a feel of the going rate in your area and try to find a company that charges in the average range. Also, check out testimonials and review their work. While we were in the middle of our remodel, the painting company asked if it was alright for a potential customer to call and to speak with me about our experience. I thought this was so smart. If you’re going to make that big of an investment, definitely do your research!
Backsplash & Countertops
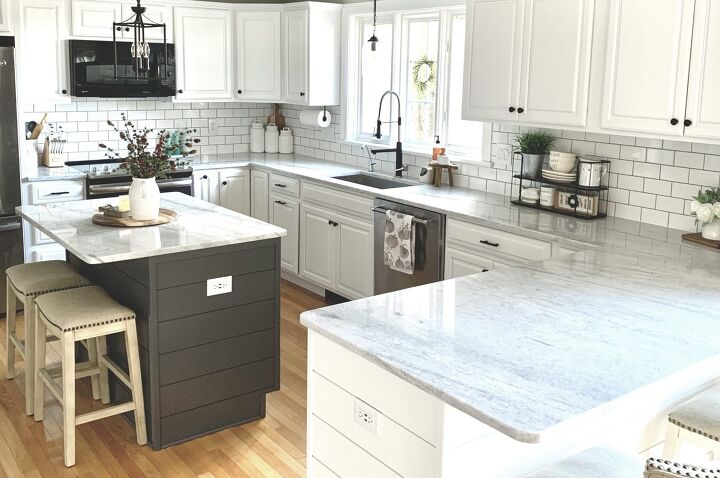
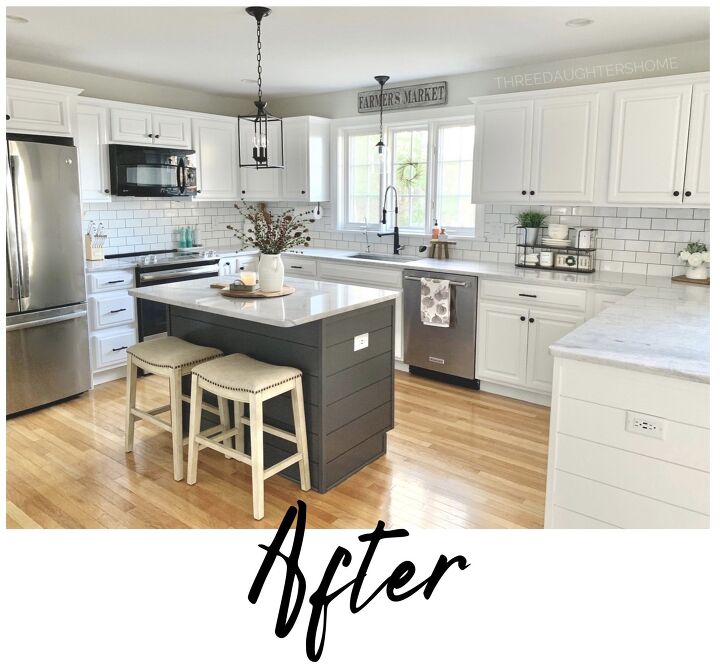
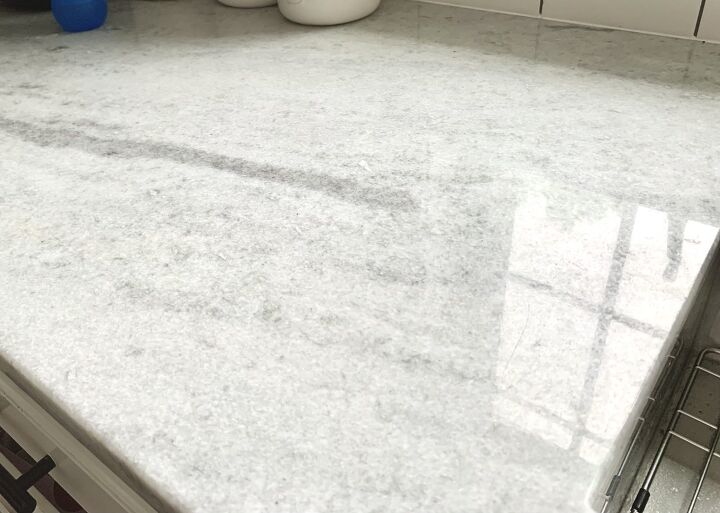
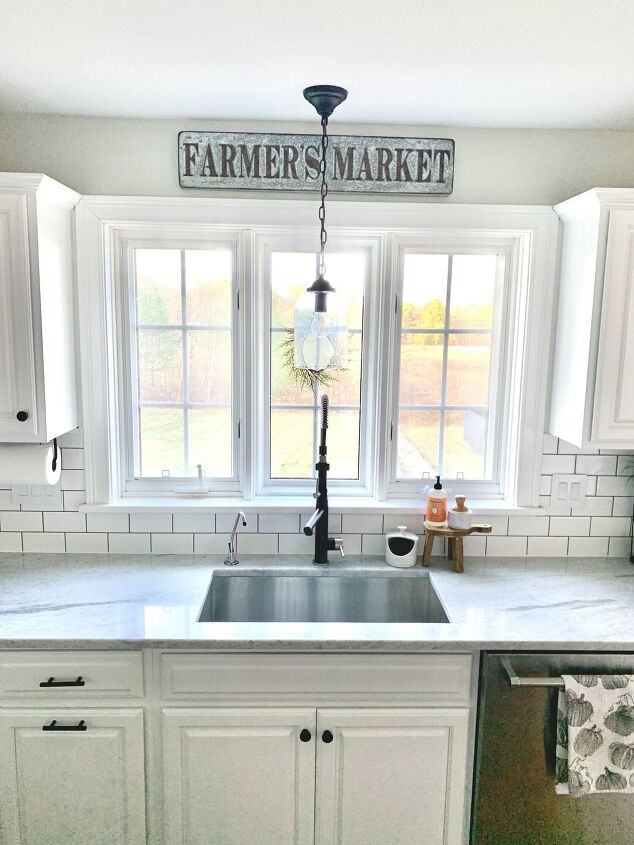
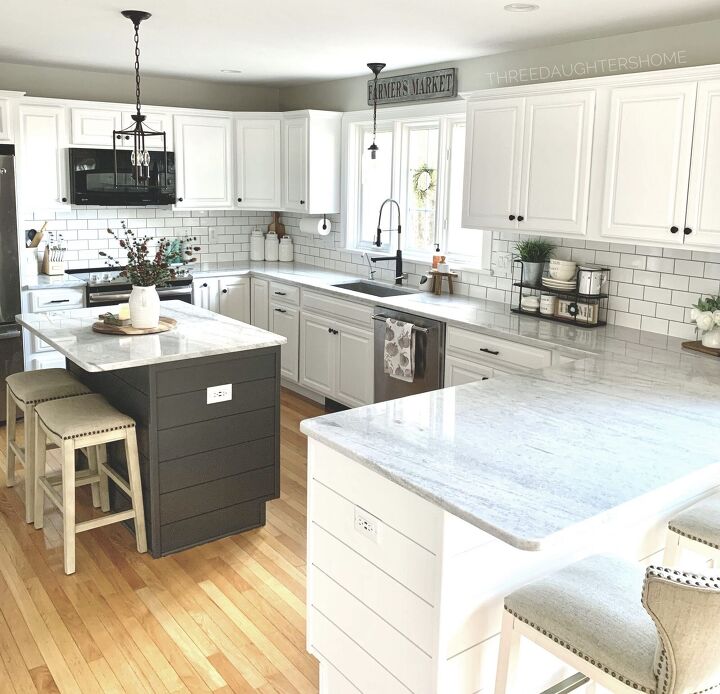
The first step of the process was having a contractor remove all the backsplash and existing countertops. I was so happy to see them go! (See ya, wouldn’t wanna be ya!) For countertops, we decided to replace the existing granite ones with a white and grey quartz. Quartz tends to be easier maintenance and more durable compared to granite while having the look of marble (minus the hefty price tag of marble). So far, both have held up great! No complaints.
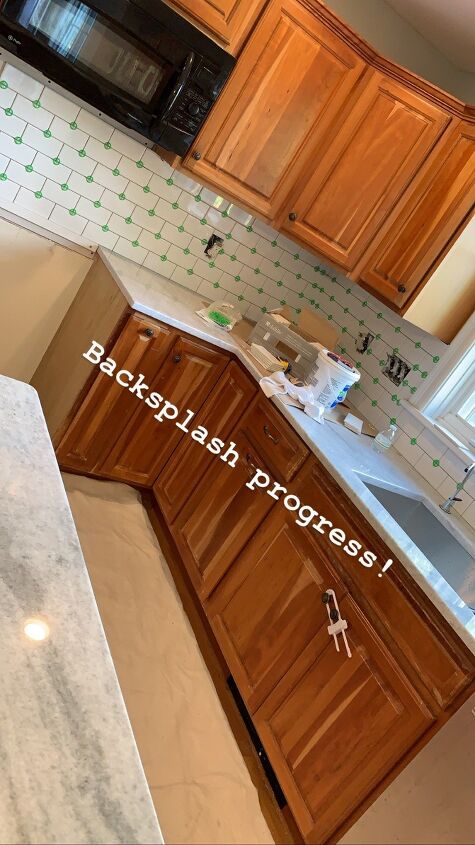
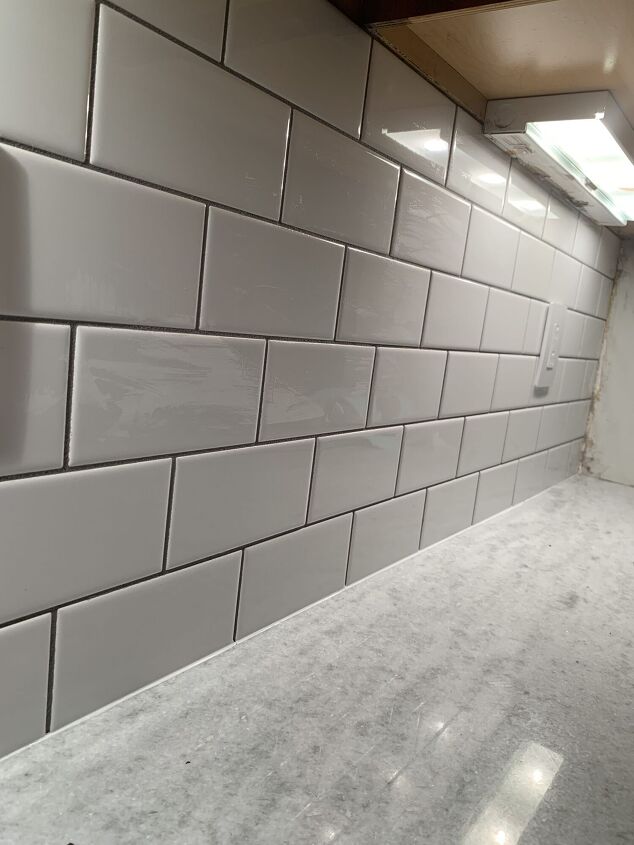
Adam and I actually didn’t see eye to eye on the backsplash. I wanted something crisp, clean and simple while he wanted something unique with some color. We ended up choosing a classic white subway tile with a dark gray grout, which I think he would now admit was the right choice for the style we were going for. The backsplash alone lightened up the room immensely! Also, subway tile is timeless and extremely affordable.
Sink & Faucet
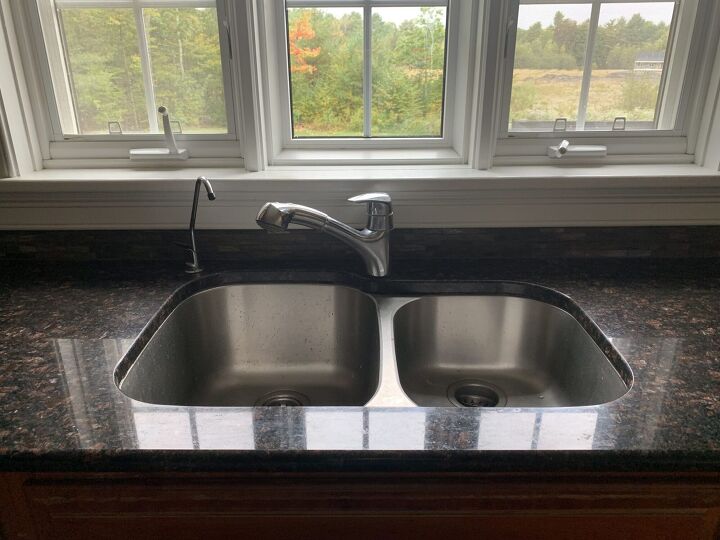
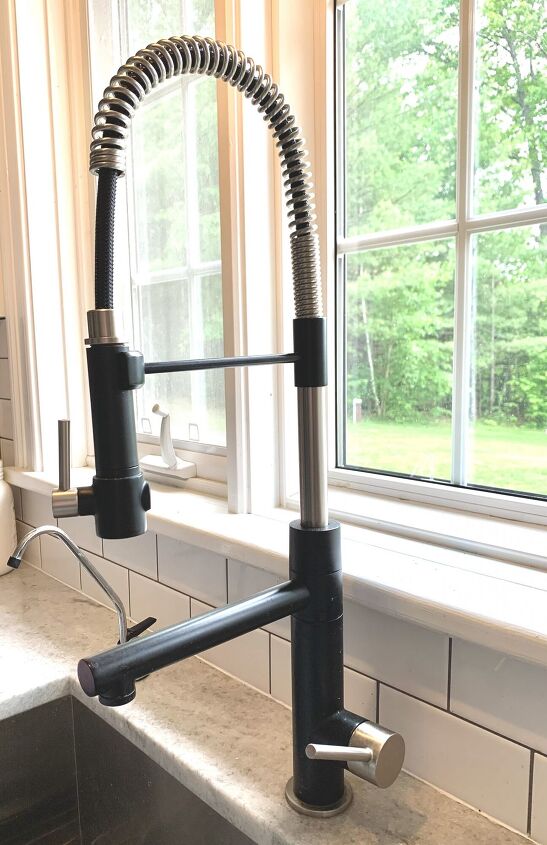
I realllllly wanted a farmhouse sink. Like, really bad. But because under the sink would have had to have been completely gutted, the added cost just wasn’t feasible to our budget. Such a bummer; BUT we did ditch the double sinks and put in a ginormous one. The pic here doesn’t do it justice. It’s a monster. Our faucet we actually found on major deal off Wayfair, and I love love love it! It is matte black and makes such a statement!
Appliances & Lighting
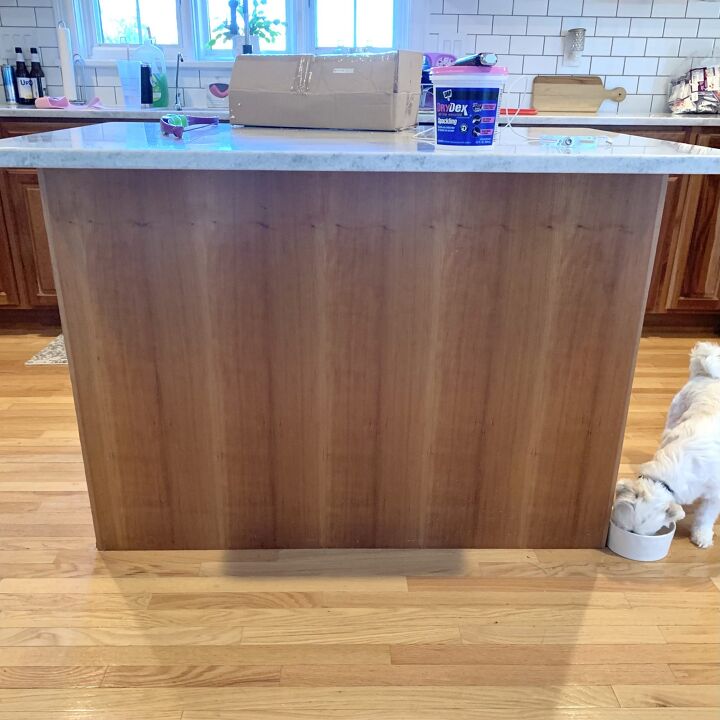
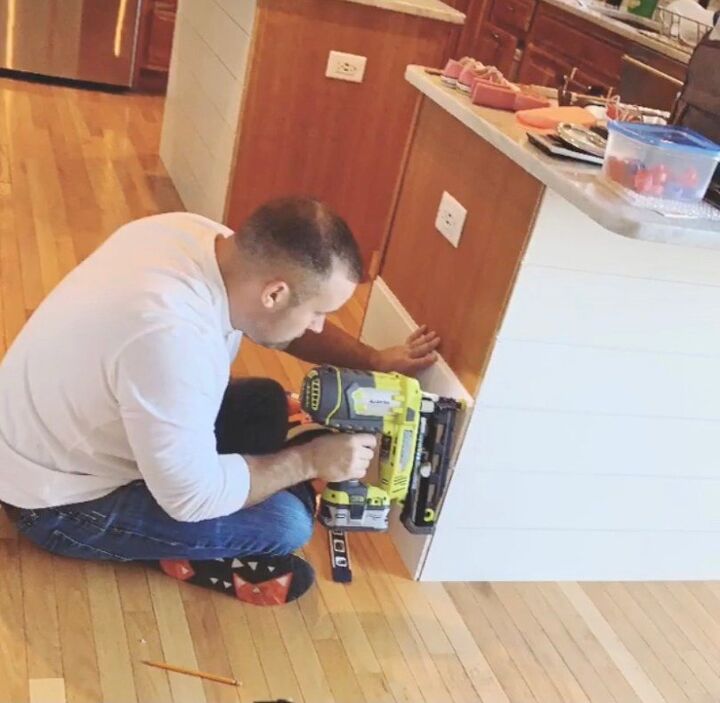
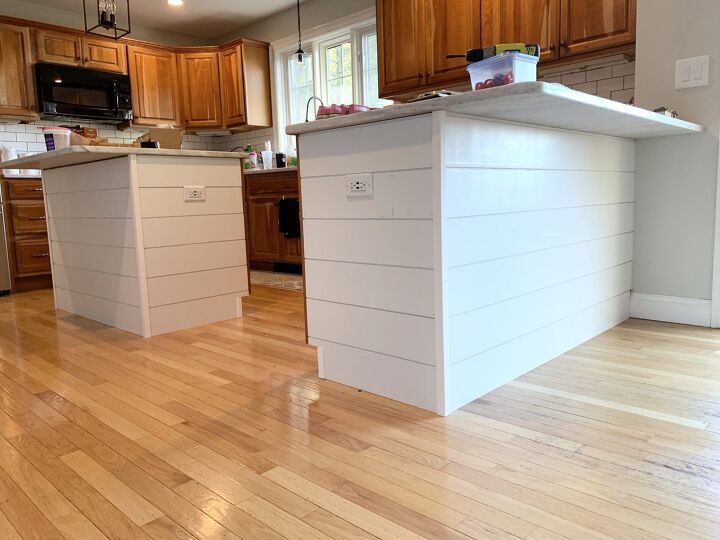
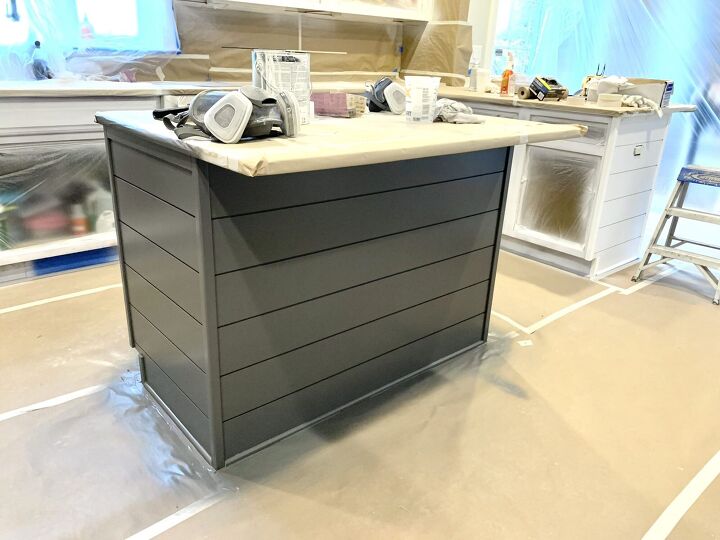
In between the contractor and the painters, Adam worked on replacing all the yellowed outlet covers with new white ones (with USB plug-ins, too, for phone/tablet charging). He also added shiplap to our island as well as our peninsula to tie-in the shiplap we have throughout our home. Adding something like this adds texture and dimension to your kitchen, and there are so many fun ways to jazz up a kitchen island!
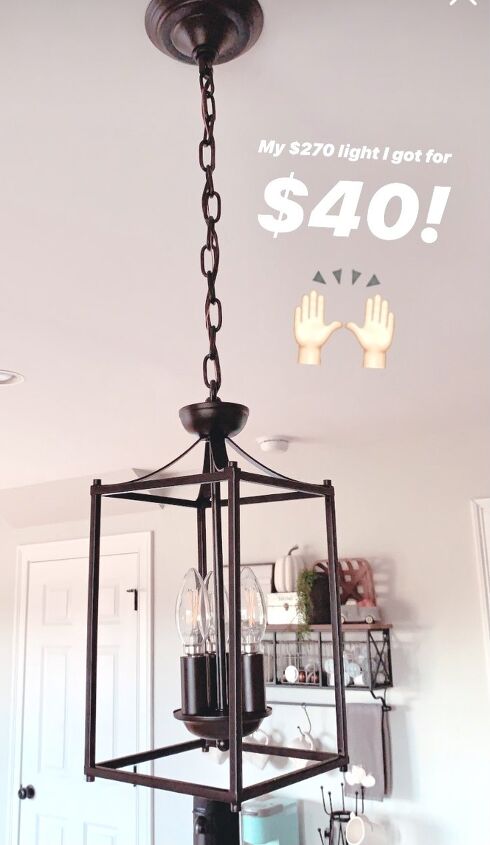
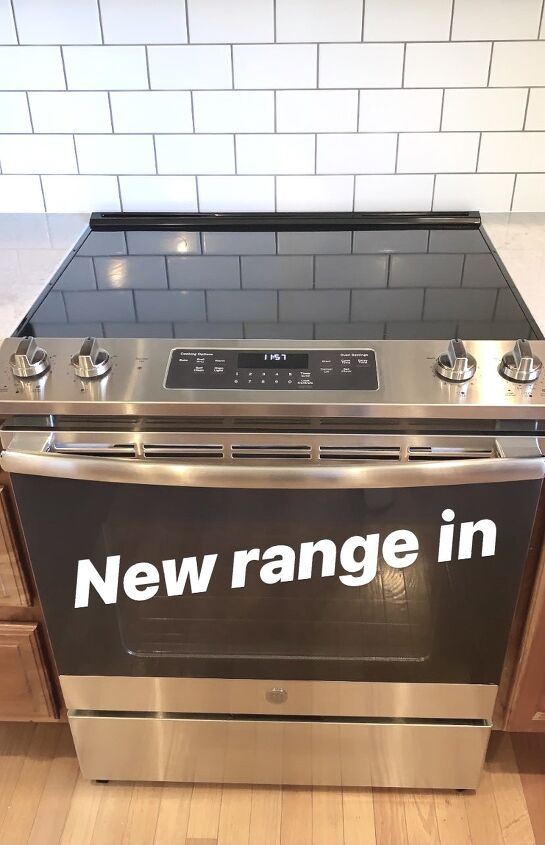
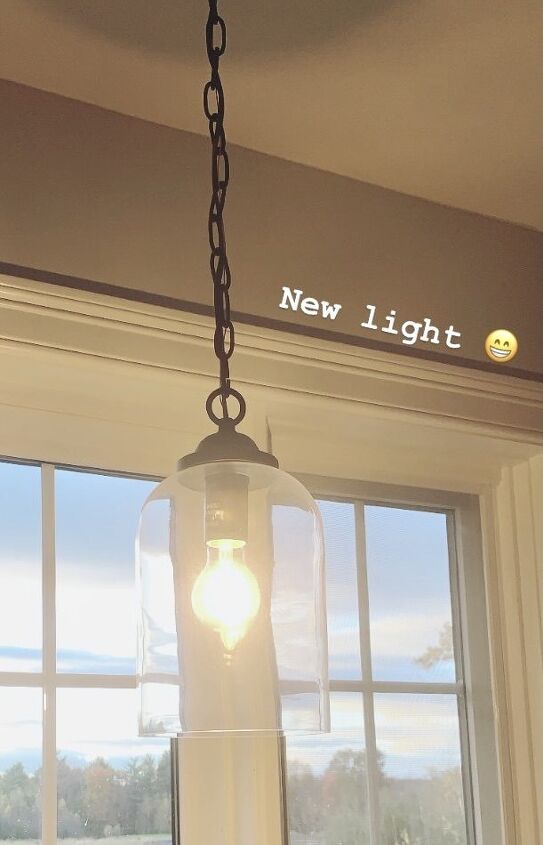
While my Mr. Fix-It worked on the shiplap, I picked out new dark bronze pendant lights to replace the existing silver ones. I chose a darker finish because I really wanted them to pop against all the white we had going on. We also decided to replace the current range and later also replaced the fridge and microwave to dark stainless steel.
Painting the Cabinetry & Island
Since our cabinets were in good shape, we decided to just paint them vs buy new ones. This saved us a lot of money (probably an additional $4-$5k)! We hired a painting company to sand, prime, paint, and install new hardware on all our cabinets and drawers. (If you’re local, I highly recommend them! Shoot me an email if you’d like their info.) TBH, this was the most lengthy part of the whole remodel process. Priming and painting take multiple coats, and while it was frustrating to not have a kitchen for a couple weeks, the end result was way worth it! They took the drawer faces and cabinet doors back to their shop for painting, and since some of the doors needed minor repair, it took a little more time. (Patience is a virtue, right?) For an extra $500, we had our island painted a different color to make it pop. If you followed along on IG, you know I was highly torn on the color, haha. But ultimately we chose the darkest swatch, which is Peppercorn by Sherwin-Williams. For the cabinet color we went with Bright White by Sherwin-Williams.
Finishing Touches Once the drawers and cabinet doors were put back on, all that was left was the hardware. We purchased our knobs and pulls from Wayfair. They are heavy and extremely well made, adding a modern touch that contrasts the white.

Then all that was left was decorating! I didn’t want too much clutter on the counter, so I kept it simple yet functional.
Final Thoughts All in all, we are so pleased with how this remodel turned out. It’s been a little over a year, and aside from normal wear and tear (mainly on the cabinets and island), we are still happy with the results. I hope you liked seeing our dark kitchen go from drab to fab!
*& if you like this post and want to see more home projects & DIYs, check out my blog site and subscribe! You'll also receive my 'Top 10 Tips for Refreshing a Space' as a thank you for subscribing!
**This post may contain affiliate links – please read my Privacy Disclosure Policy for more information, and as always, thank you for shopping my links, which allow me share fresh content with you!**


Comments
Join the conversation
Lovely! The only thing I would do you it paint the glaringly white plug cover on the island, the same color as the island.
love what you did this is beautiful. what are measurements of kitchen. Mostly the backslash and Color choices, really brightened it up. Job well done,what’s your next remodel?
Any ides for a 8ft kitchen with a 3’ nook for stove by 13’ long,no storage. Love to see you do a project like that.