Our Finished Basement Remodel – Three Daughters Home

***For full blog post complete with links to sources, please visit this post on THREEDAUGHTERSHOME.COM. Thank you!!***
This post has been a long time coming! I meant to write this months ago, but I’ve been partly wanting to have it fully decorated and partly procrastinating, lol. Last summer, around the same time we started our extreme patio makeover (linking that post here), we decided to remodel our walkout basement. This was a project my husband and I knew we wanted to do at some point, but after I had the twins, more room and a quiet workspace for Adam was a must. We are over the moon to have this space for the girls to play, have movie nights, sleepovers, etc., and it’s been perfect for playdates and family gatherings! Keep reading because I’ll share all the details of our finished basement remodel — from our original plan to the finished look, what we would have done differently, and what we still plan to do. But first, who doesn’t love a good Before & After?! 😍

The Vision
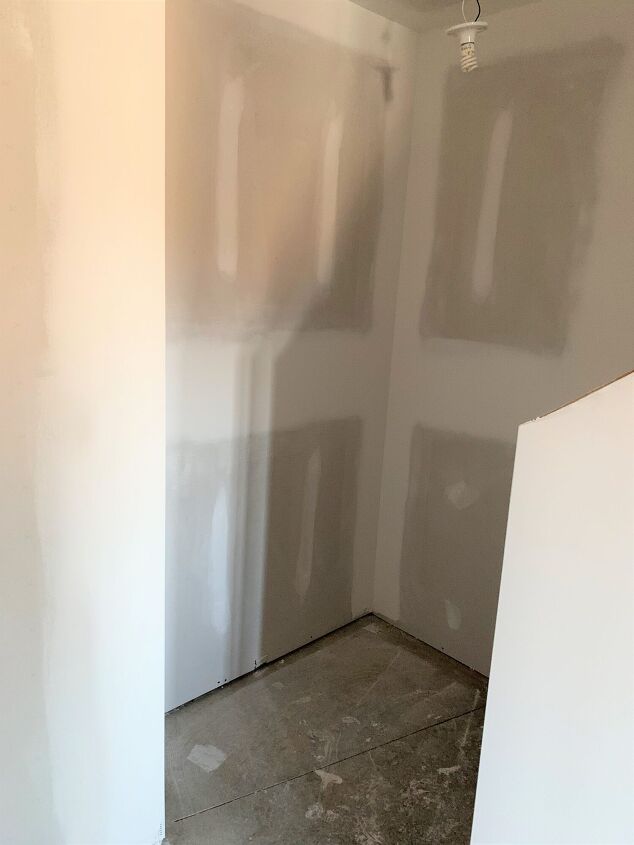
I gotta hand it to the hubs when it comes to planning. As usual, he handles the preliminary homework, then I swoop in with all the pretty little details… (right, hunny??). We’re quite the duo. 🙂 Prior to the construction of our finished basement remodel, we were only using about half the basement as storage. The rest was dead space. The original layout was open at the bottom of the stairs, and you could go left or right. We walled off the right side all the way to the existing wall and kept all that ‘backroom’ space as storage. The rest of the basement was transformed into a large family room and office. We also really wanted a bathroom to save people from schlepping through the house in wet bathing suits from the pool, but the cost and needing an up-flow toilet prohibited this… for now. We still had it framed out for down the road and plan to install a powder eventually.
Getting Down to Business
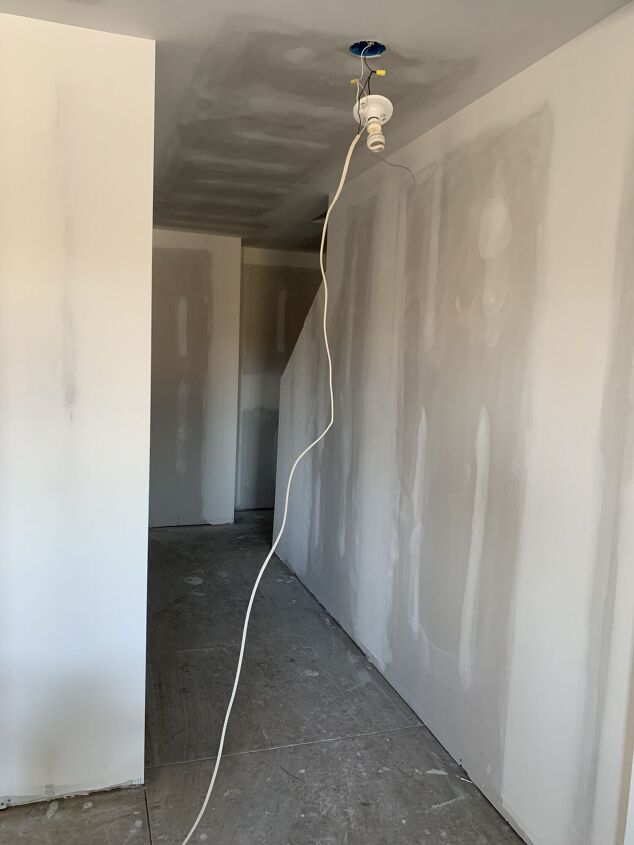
The project as a whole, from start to finish, took about three months and added about 600 sq. ft to our home. We hired Laroche & Son Drywall out of Sabattus (which if you’re local, we highly recommend them!) who did all the framing and drywall. We also hired painters to do the walls and ceilings. I painted the double walkout doors onto the patio as well as the door to the storage and would be happy to never have to paint a door again. Not my jam. Adam did the stairs, electrical, and finish work (i.e. baseboards, trim, columns) himself because he is actually superman with a toolbelt. The part that took the longest was the framing and drywall, for sure. If my memory serves me right, this took a few weeks. Once the walls and ceiling were up, you could really start to picture how the space would look!
Flooring / Stairs
For the floors, we went with luxury vinyl plank flooring, also known as LVP, in the color River Walk Oak. We loved the look of wood, but with people coming in and out from the pool we needed something waterproof. LVP is perfect because it has the look and texture of wood, but is super durable, water/scratch resistant, and at under $3 per sq. ft, it’s an affordable option. We got our flooring from Lumber Liquidators, but if you don’t have a store near you, Woodacres Oak from Home Depot is a similar option. The stairs were basically painted plywood pieces prior to this project and needed a facelift. Adam decided to tackle these himself by putting on new risers, treads, and trim pieces. I wish I could tell you the stain he used, but we tested so many different color combinations (and had them all laid out on our garage floor lol). — Your guess is as good as mine! 🙃
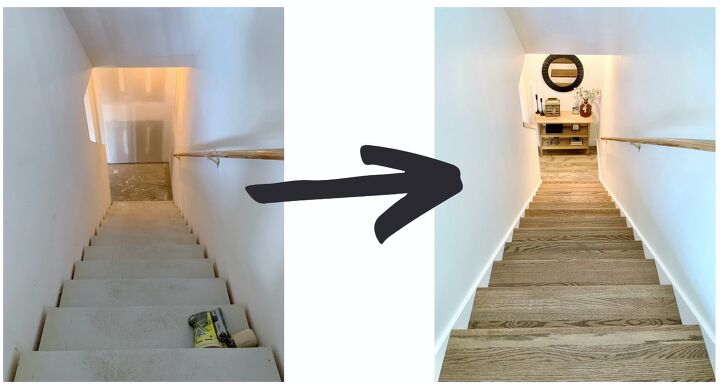
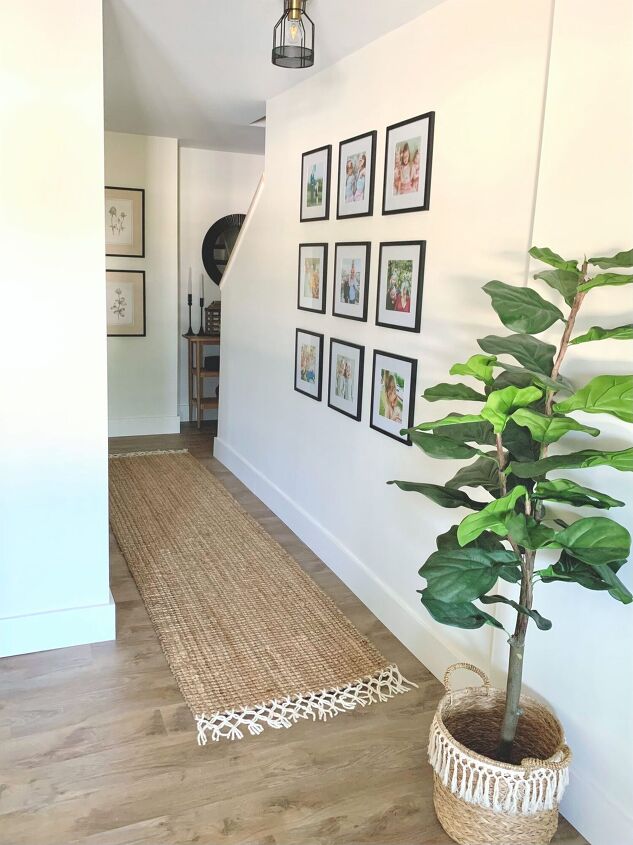
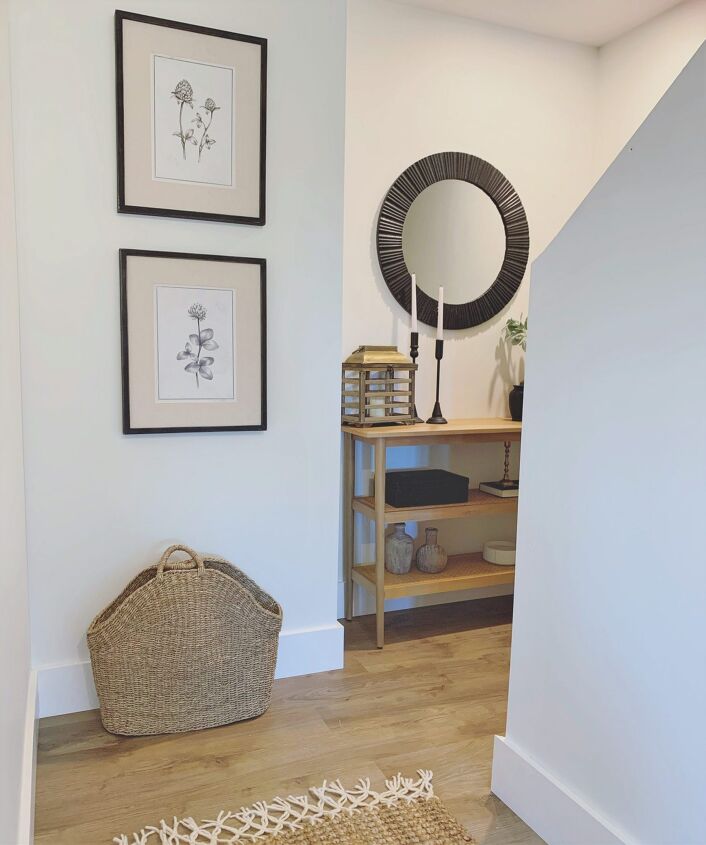
Stair Landing & Hallway
For the bottom of the stairs, I knew I wanted a console table and a mirror. This particular wood and cane table fit absolutely perfect, and the mirror was a thrift store find! I realize that a lot of the items pictured below are either not linkable or currently out of stock (whomp whomp); but I’m still linking them in case they come back. I’m also linking some dupes for the floral frames and a table that’s almost exactly the same measurements as mine.
**for links visit threedaughtershome.com.
Hallway / Landing
For the hallway, I added texture with this seagrass basket, which is perfect for tossing all the things that need to go back upstairs, as well as this tasseled jute runner, which despite jute’s bad rep, doesn’t really shed! I also added a gallery wall, which I love because I can see a portion of it from inside our family room when I’m sitting on the couch. 🙂
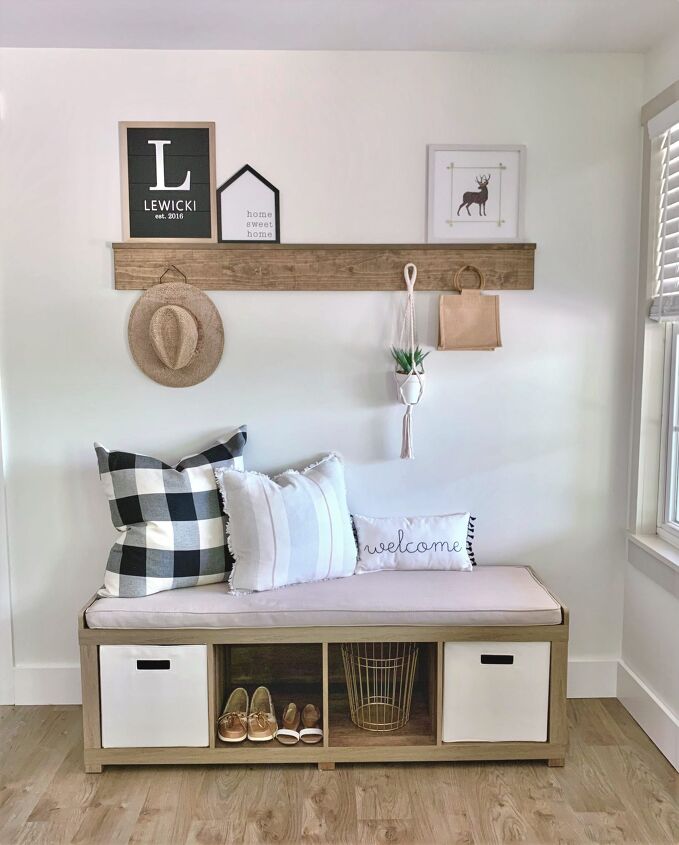
Walkout Basement Entry
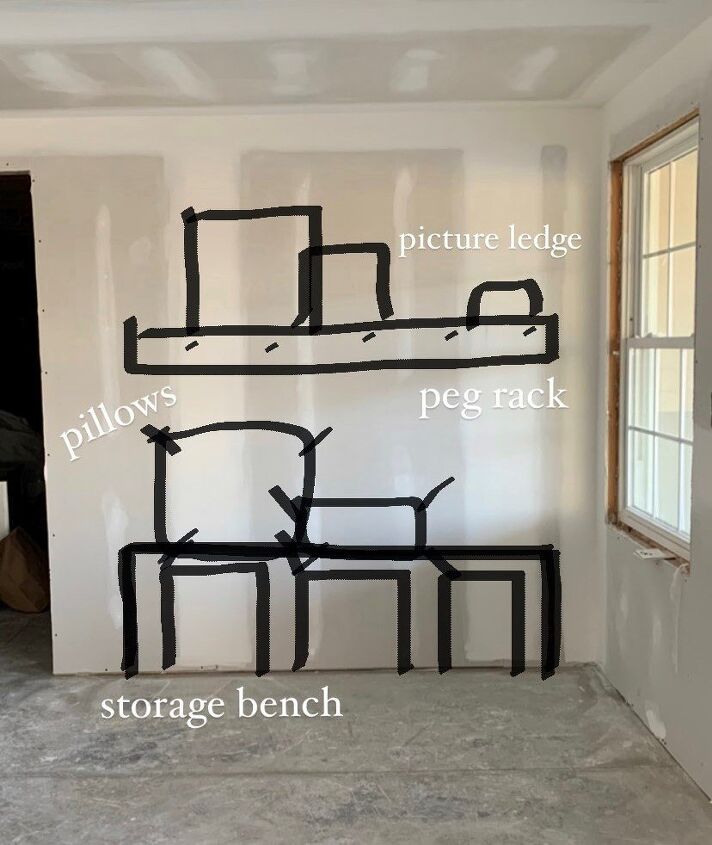
Bet you’d never guess that behind this wall is framing for a {someday} bathroom! That being said, I knew whatever went in this space would be temporary, so I decided to make it a little ‘mudroom’ for people coming in and out from the patio. I had this little area visualized in my mind well before the walls even went up and knew I wanted a padded bench. We use it for storing towels, sunscreen, and the bins are perfect for throwing shoes and sandals into. I searched high and low for an extra-long peg rack with a picture ledge on top, but it was way cheaper to have Adam make one. (Linking one similar in case you don’t have a live-in handy man.)
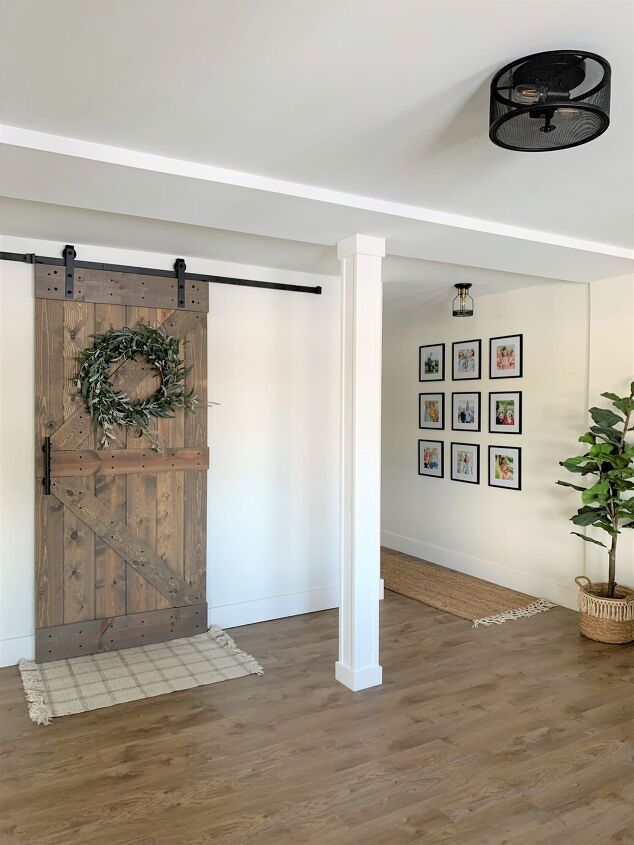
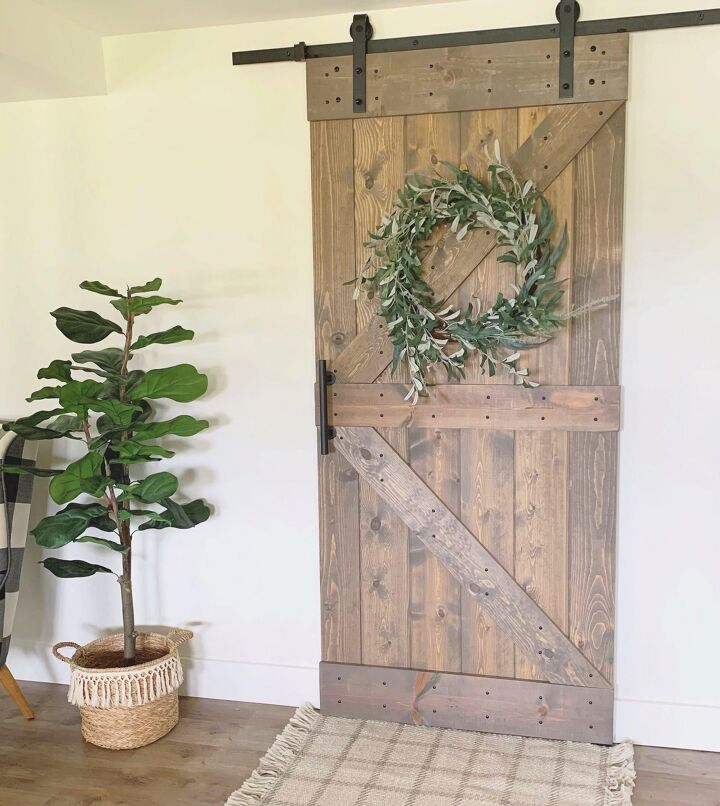
Sliding Barn Door
Adam and I both wanted a sliding barn door for his office! Truth be told, I’ve always wanted one somewhere in our house and after installing this bad boy, it might be the last one I get, lol. This baby was HEA-VY, and Adam installed it all by himself (with very little help from me)! This particular door came pre-stained and included all the hardware, which was a huge selling feature since the hardware alone can get super pricey. I love how the wood tones compliment the flooring, and a wreath adds a touch of greenery. (The picture below was before I moved Evie’s little table and chairs – I swear I don’t have a hundred fiddle figs in my basement, lol.)
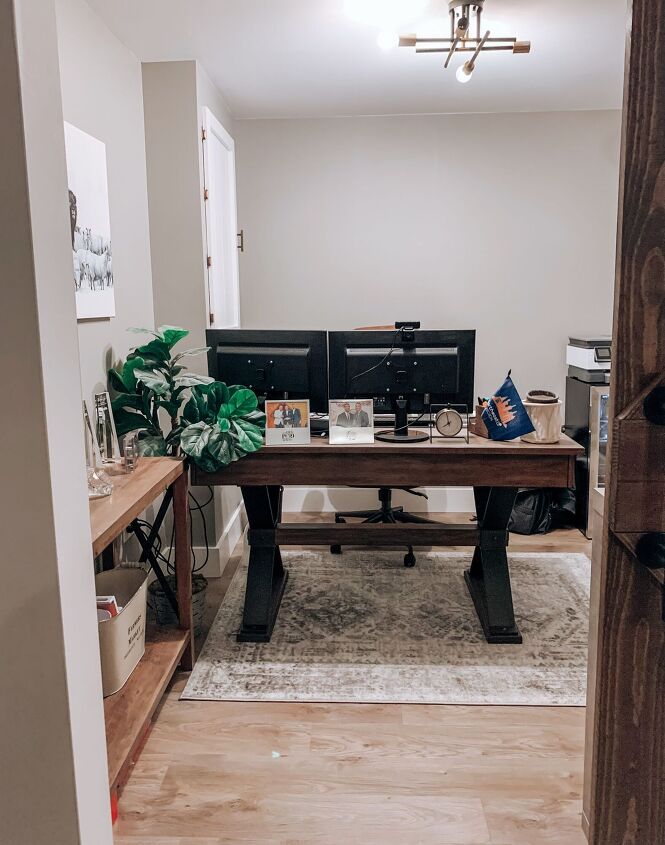
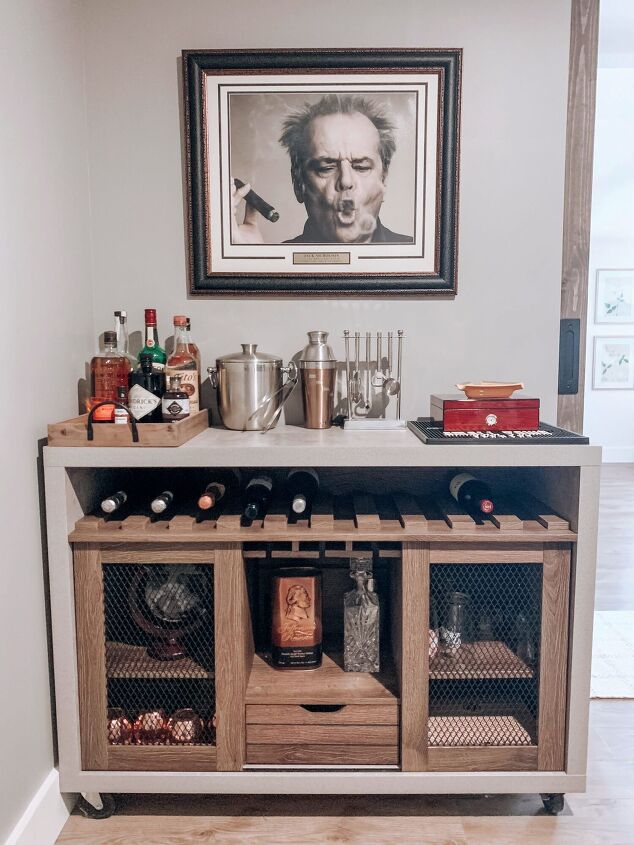
Adam’s Office
Now, I know the giant Jack Nicholson head screams my style, but believe it or not, I did not decorate this room, lol. Adam’s space = Adam’s design. The only thing I chimed in on was the paint color. Adam had originally wanted a dark grey color, but since there’s no windows, I suggested a lighter grey. We agreed on the color Revere Pewter by Benjamin Moore and used this color on the window trim as well.
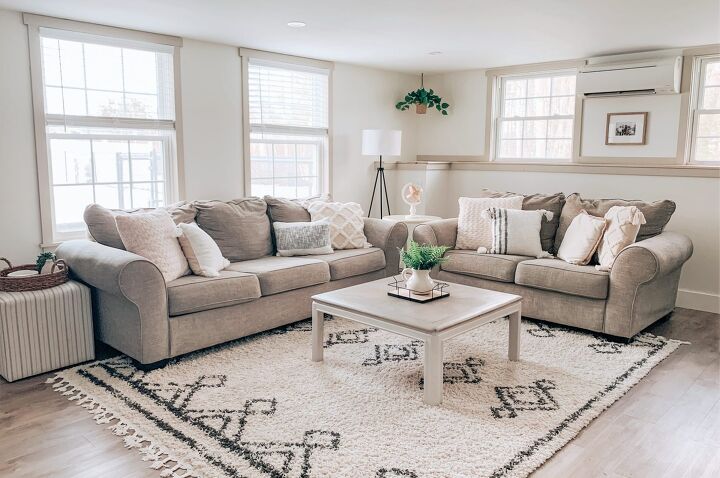
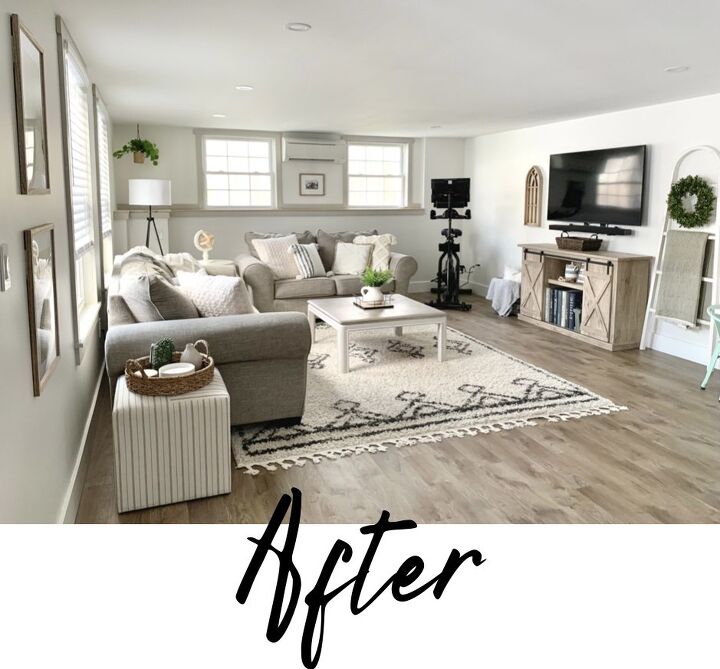
Family Room
Now to the meat & potatoes of the project: the family room! Full discloser: Baby items were 100% moved prior to these photos, lol. (We do keep two pack n’ plays with toys for the twins in here. It just throws off the feng shui a smidge, 🥴.)
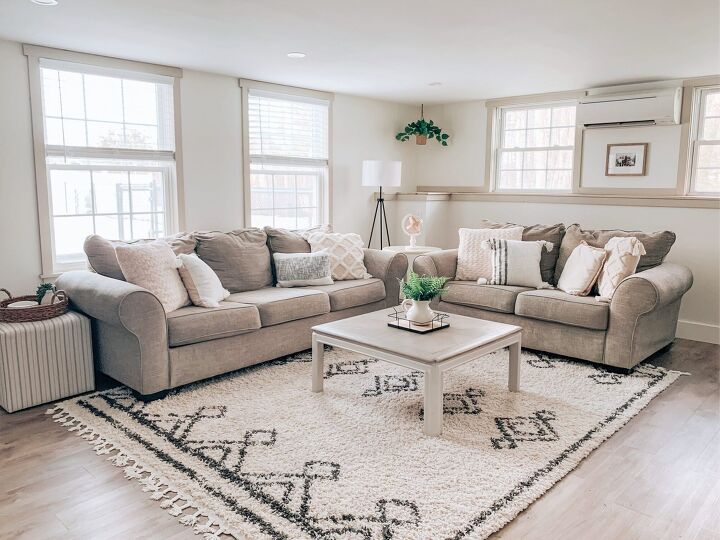
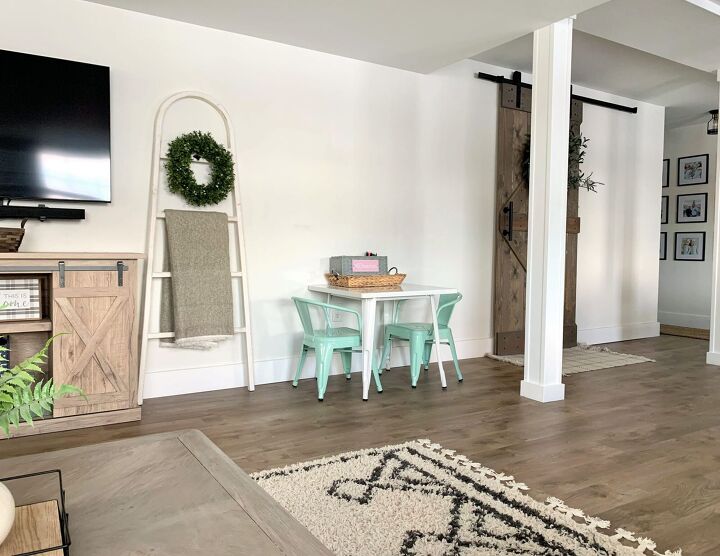
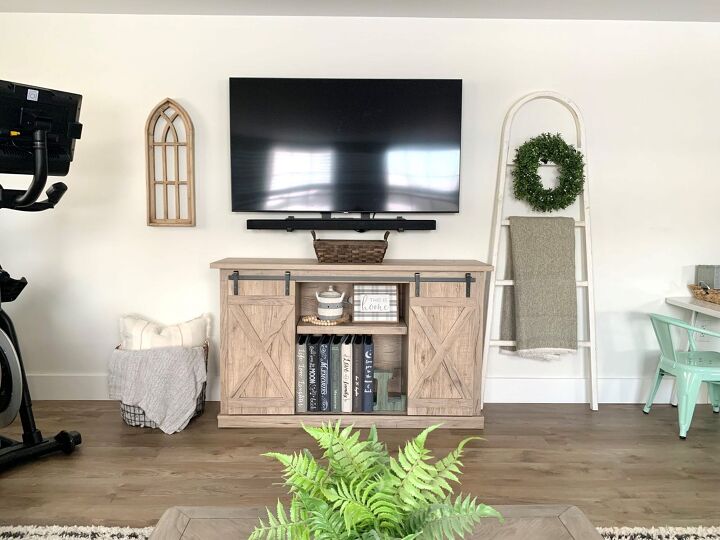
Sooo, the family room ended up being much bigger than I had anticipated, lol. I’m not complaining! We ended up basically bringing our upstairs living room downstairs and got all new everything for the living room. It worked out because we really didn’t like the flow of furniture in our main living space. My goal was to keep the space light and bright, so I incorporated a lot of woods and neutrals. I added new pillows (which were all super affordable – knowing they’ll get beat up on anyway) and a few new decor pieces, but the rest I shopped my own home for. (Aside from the Nordic Track bike, which I tried to put in the least conspicuous corner possible. Which doesn’t exist, fyi.) The little table and chairs was added for Evie to have a place to color. (I still have some decorating on the wall here.) I’m not crazy about the pop of mint green, but it’s definitely practical, especially with two younger babes. The tv stand stores all our family photo albums, board games, and even a wax warmer which I can easily hide when I’m not using. My goal was to make this room as home-y and ‘us’ as possible, knowing that there will be lots of cozying up down here.
Final Thoughts — What We’d Do Differently
-We gravely underestimated how messy the drywall process would be / I thought the drywall-ers covered things before starting… nope. The unfinished side of our basement got covered in a layer of drywall dust. Lesson learned: Cover your schtuff.
-Adam has said he wished we had insulated the walls of his office. High pitched baby squeals (x2) travel fast, lol.
-It’s minor, but I wish we had centered the light at the bottom of the stairs. You can’t tell in pictures, and truth be told I forget 99% of the time, but it would have been nice to have installed a pretty light versus a recessed light.
-I sort of wish we did some sort of wall treatment on the large wall with the tv. Something to break up the space a little. It’s never too late, I guess! But I think that wall is missing something — and a wider media console would help, too.
Future Plans
As mentioned above, we definitely want to add a bathroom down here at some point. Since the doors walkout to our pool and patio, an easily accessible restroom would be clutch. We’ve also talked about getting new couches down here at some point, along with a recliner Adam has been begging for and 100% deserves. We are enjoying this newly added space and can’t wait to see it evolve along with our family. If you are thinking of finishing your basement, I hope sharing our finished basement remodel is helpful! Thank you for following along, and happy remodeling!
**For links and the full blog post, please visit www.threedaughtershome.com.

Welcome to Three Daughters Home – a place where I share my home styling tips and DIY projects! www.threedaughtershome.com -- come visit and SUBSCRIBE, and as a thank you I'll send you my 10 Tips for Refreshing A Space!


Comments
Join the conversation
We are renovating a 1967 ranch. We are into the mudding now and I'm getting frustrated. I guess I've gotten to the point where I just want it done and the mess gone. Your story has given me renewed excitement over the coming phases. You did a great job ! It's beautiful. Thank you so much for sharing.
Awesome transformation! Great work! Enjoy!