Powder Room Makeover - Three Daughters Home

To read this project in the best quality, please consider reading it HERE on my blog site (threedaughtershome.com). Here you will find links to everything and proper formatting.
*If you like what you see, hit subscribe and as a thank you, I'll send you my Top 10 Tips for Refreshing Any Space in your home!
Do you have a room in your house that functions just fine, but you have half a mind to just completely re-do it because it doesn’t suit your style? That’s been me with our first-floor powder room. So, when Adam asked me what I wanted for my birthday, I sort of jokingly (but totally seriously) asked for a new powder room. Without hesitation, he said “okay.” Umm, what?! My husband is a saint. I know. Keep reading to see this jaw-dropping powder room makeover!
Before + After
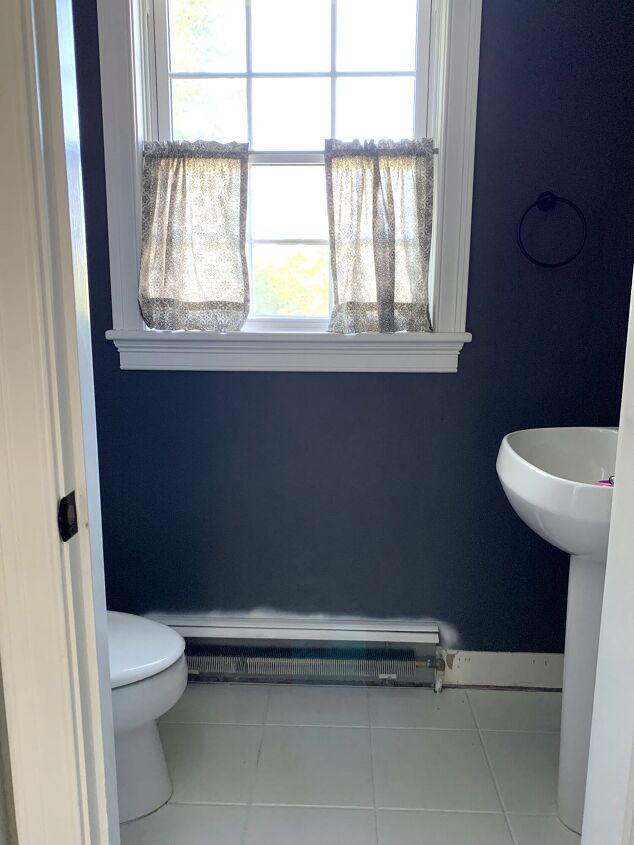
To fully appreciate the transformation, let’s see where we started, shall we? Here’s some before and after’s of the sink, dating back to the listing photo (the only listing photo of this room for a reason, lol — good ol’ magazine rack + all. 😜):
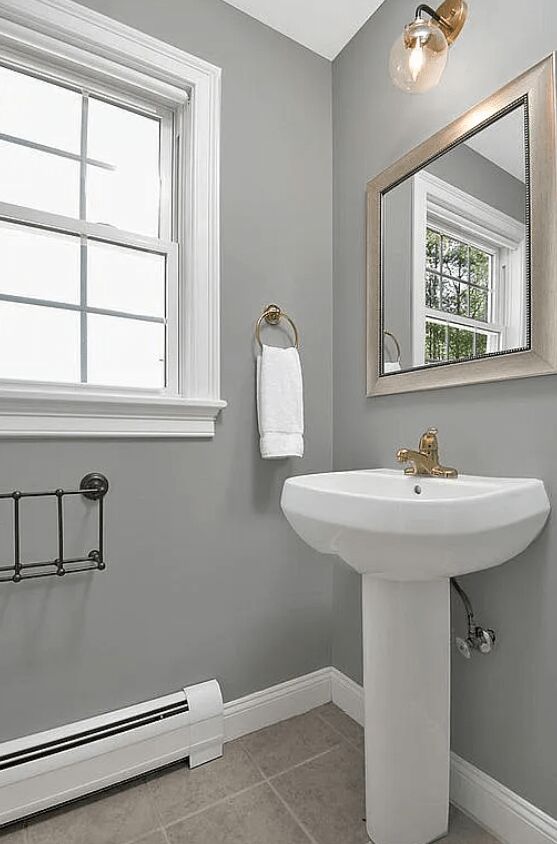
Prior Changes
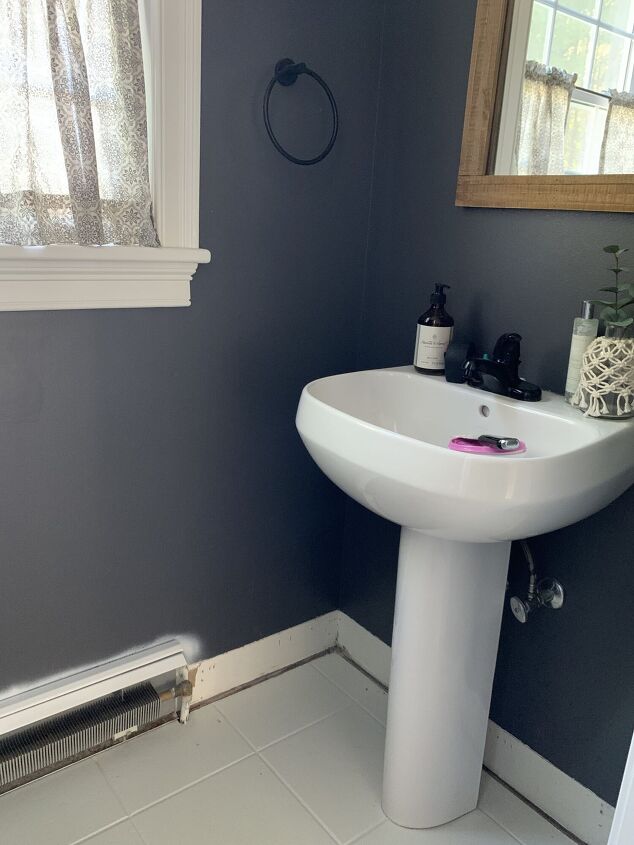
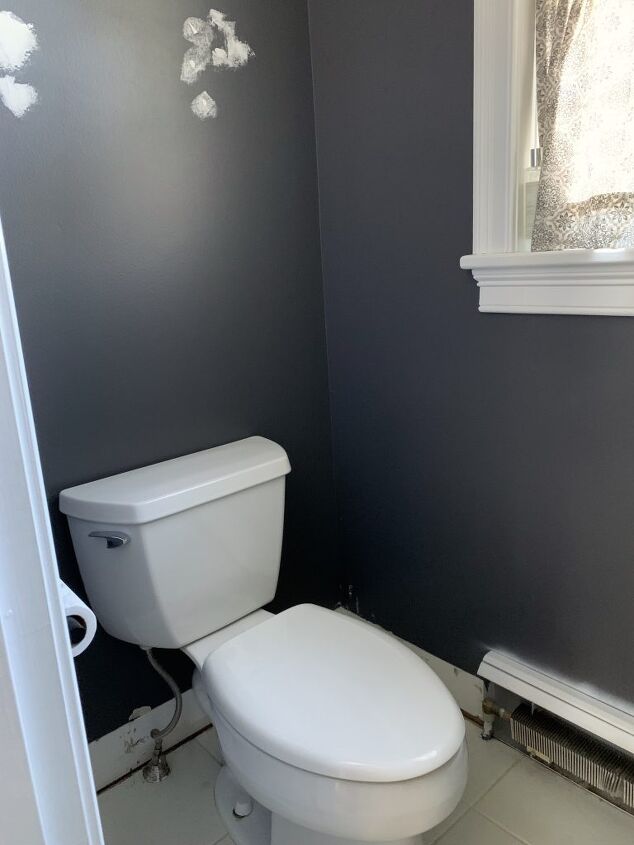
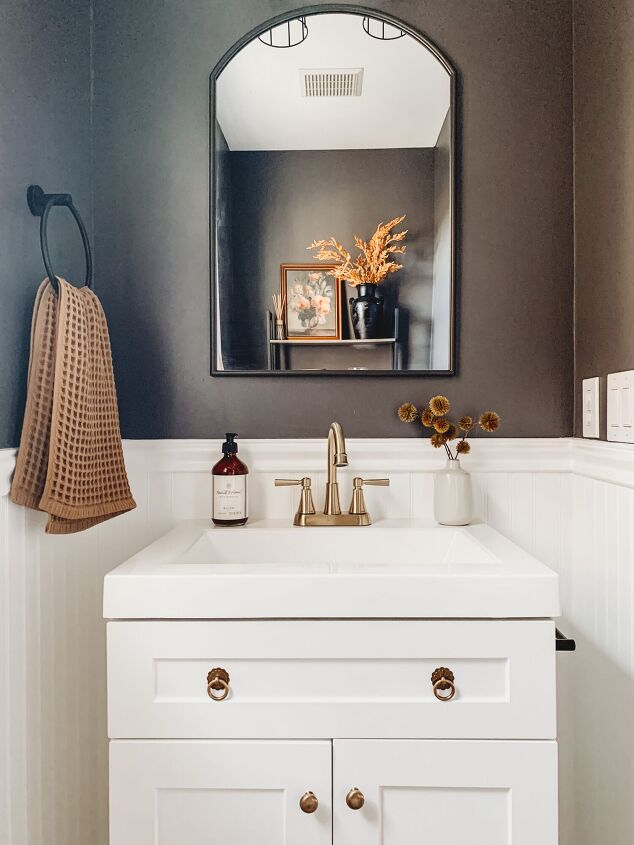
As you can see from the first to second photo, we did make some changes prior. When we renovated our kitchen (see that post on threedaughtershome.com), I used the leftover kitchen island paint in the powder room. I decided to go a bit bolder in here with a dark color, Sherwin Williams Peppercorn, since it’s a very small space. (Be it small, I never want to paint a bathroom again. Everrr.)
I also painted the floor tile white (see that post on threedaughtershome.com) as a temporary fix for what was, in my humble opinion, an ugly af tile. We swapped out the hardware, mirror, and I spray painted the faucet black. Ironically, we brought back the gold just brought it into 2022. Aside from installing the new light and hardware, I have done all the painting (floor + walls) myself. It was time to bring in the big guns!

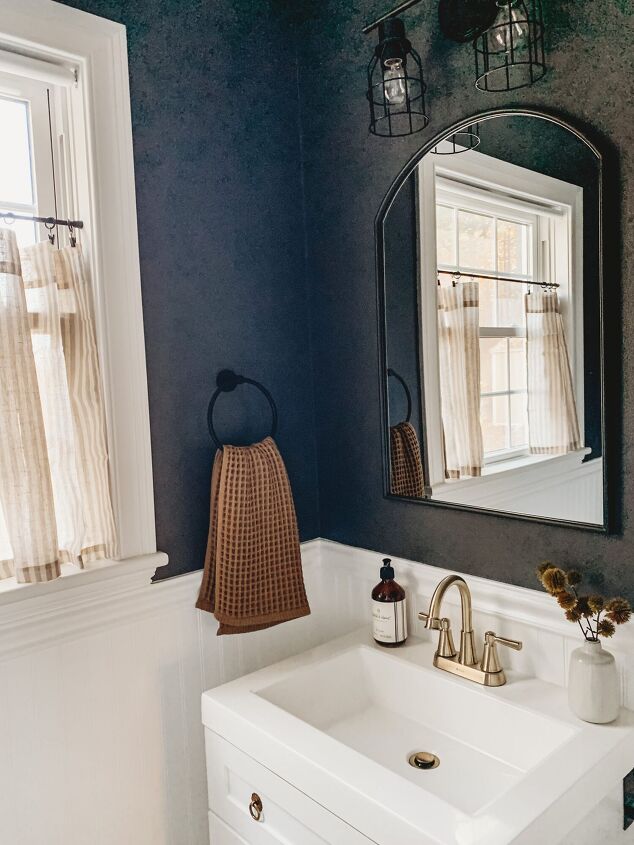
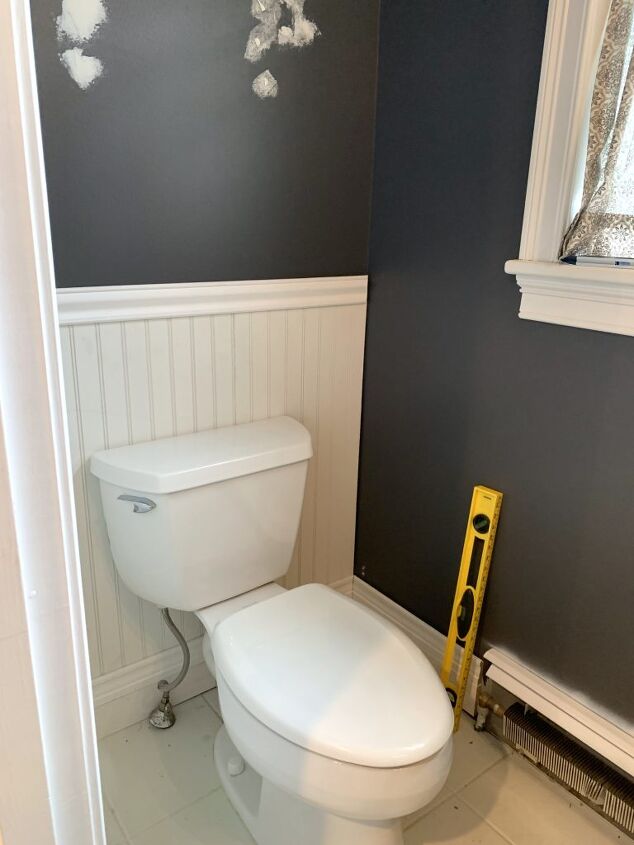
Beadboard
To add some texture and brightness, we added a wall treatment. (And by ‘we’ I mean Adam was crouching, gluing these boards like a dang man pretzel.) About a year ago, he installed beadboard in the hallway adjacent to this bathroom, so we continued it for a cohesive look. Originally, I was thinking I wanted to paint the walls above the beadboard, but we both ended up liking the contrast (and truthfully neither of us wanted to paint, lol).
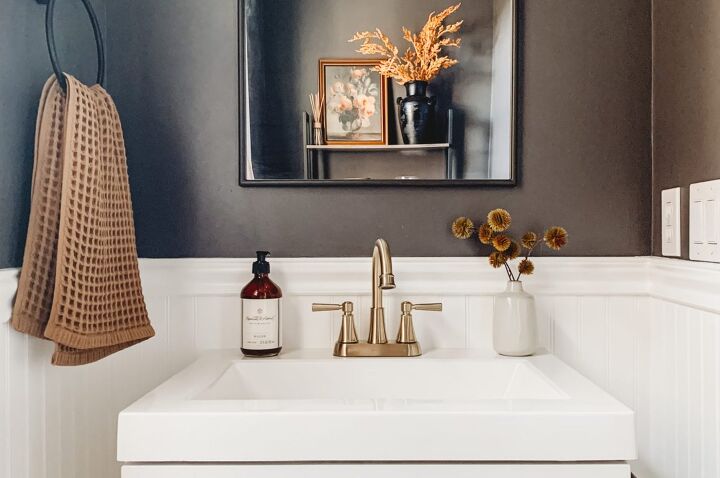
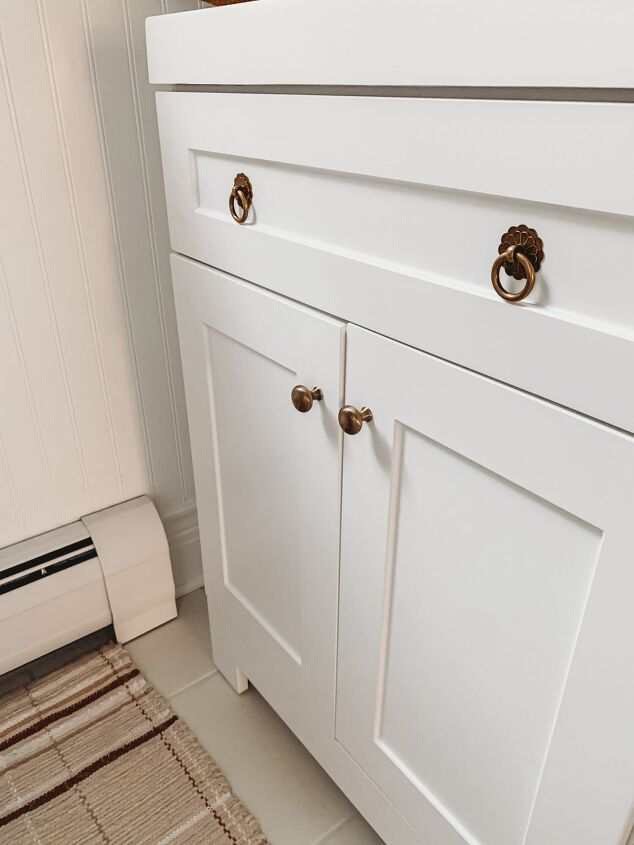
Vanity + Hardware
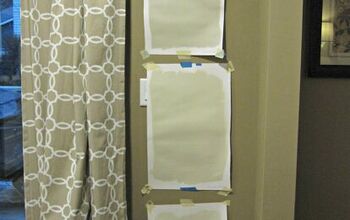
The number one thing this room was lacking was storage. That pedestal sink had to go! Believe it or not, it was quite challenging finding a vanity that fit this small space — especially depth wise. It juts out a couple more inches than I’d like, but for added cabinet and drawer storage, I’ll take it! The mirror we had there before was beautiful, but the wall was craving something with more height. To help me visualize the space, the e-designer e-designed 😄. Hey, when in doubt, draw it out:
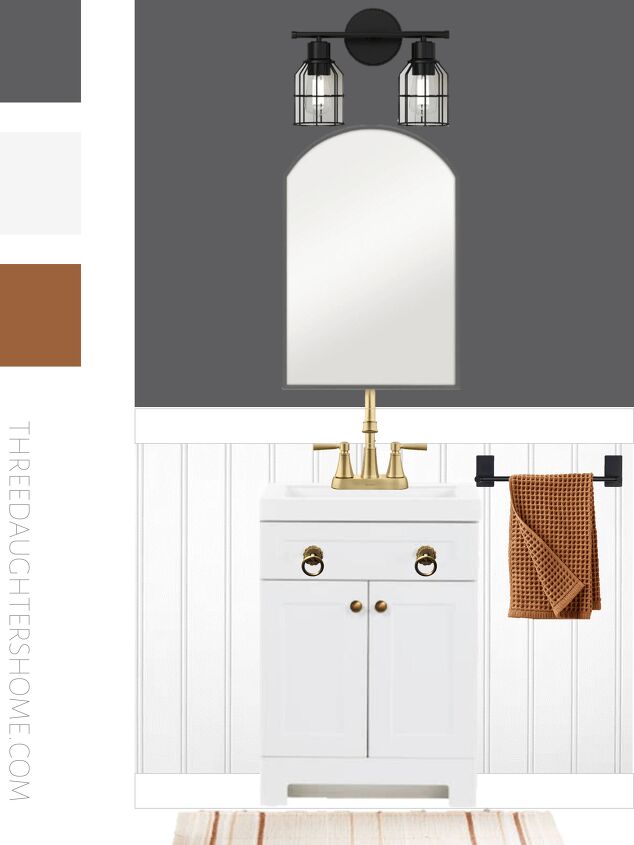
And here is the final space: (*Eventually I will replace the circle towel rack with some framed artwork.)

**SHOP THIS POST by clicking HERE.
+PRO TIP: If you’re on a tight budget, or just wanna save some money (who doesn’t?), buy a plain, run of the mill vanity and zhuzh it up with fancy hardware! This vanity was one we grabbed in-stock at Home Depot. I bought antique gold knobs and an adhesive towel bar to give it a more expensive, custom look.
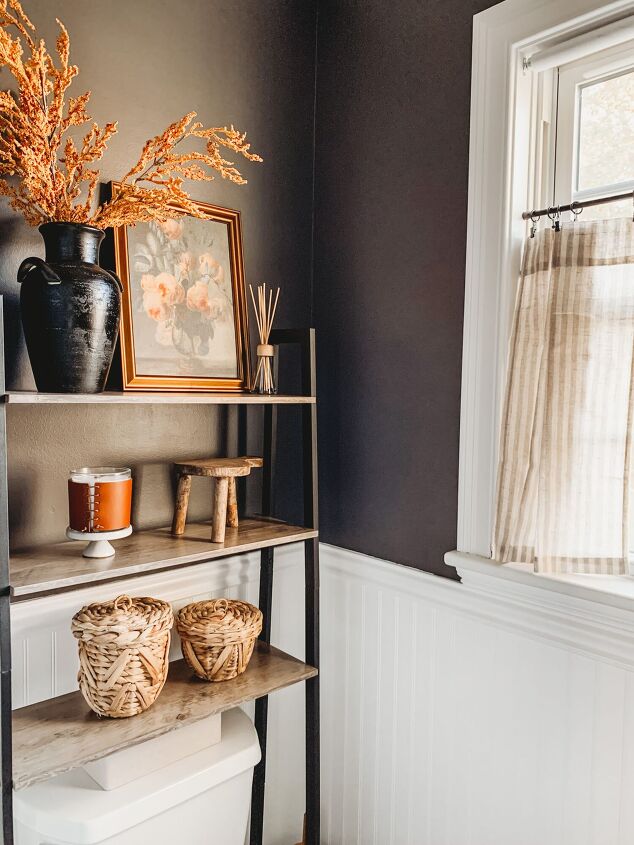
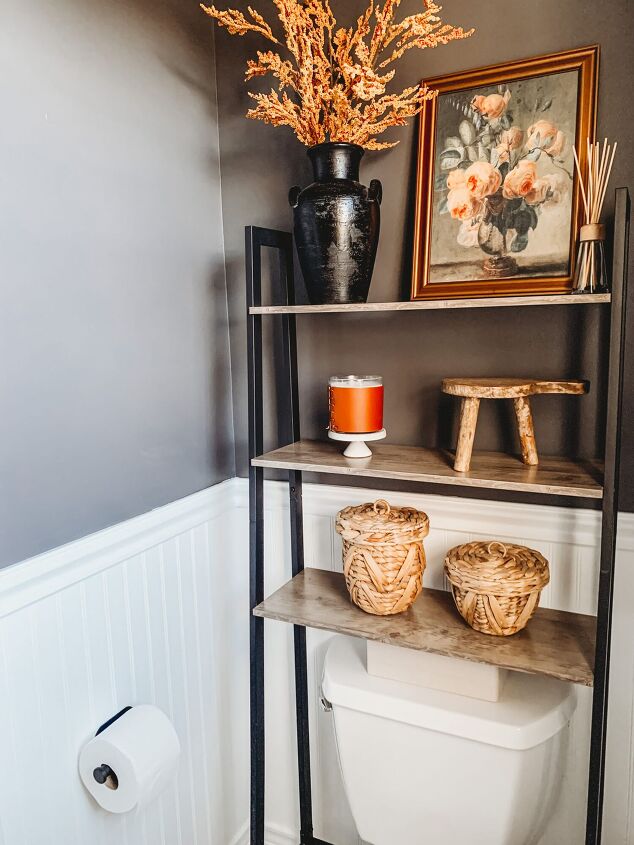
Over-the-Toilet Decor
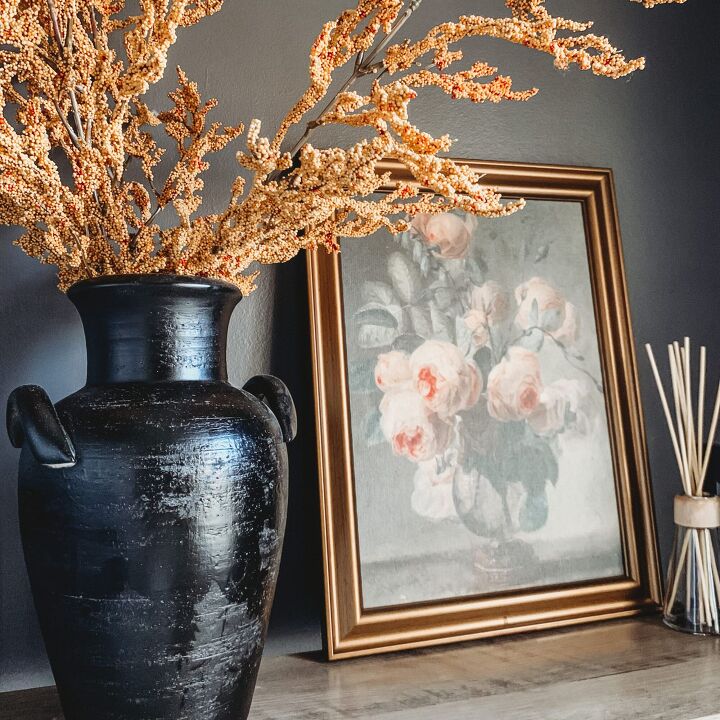
Besides the lack of storage, I really couldn’t stand my decor over the toilet. I laugh now because I hated it yet put up with it for 2+ years lol. As I move away from traditional farmhouse and towards a more modern style, the Hobby Lobby sign and overpriced Decor Steals shelf had to go. I replaced it with a metal tier shelf from Wayfair and added a few new pieces. Otherwise, I used what I already had on hand.

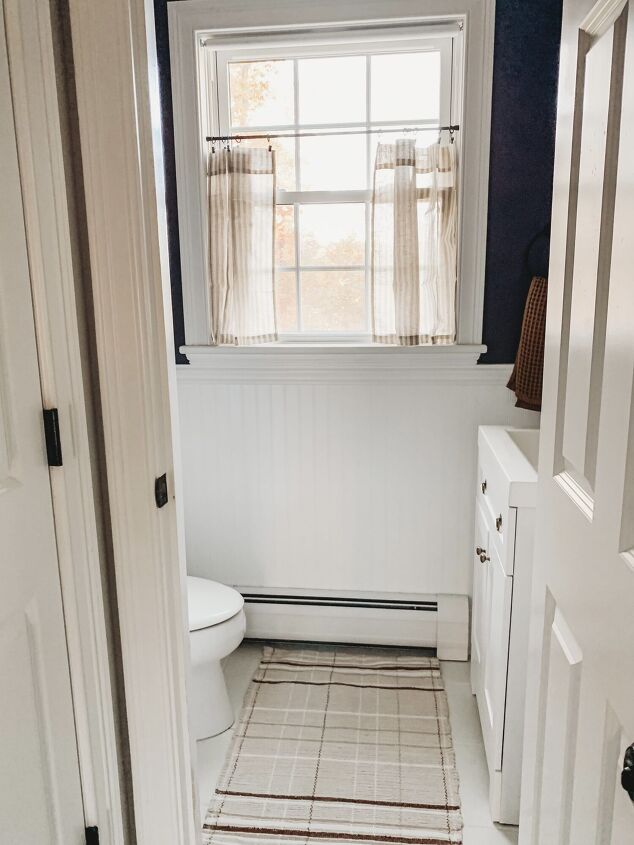
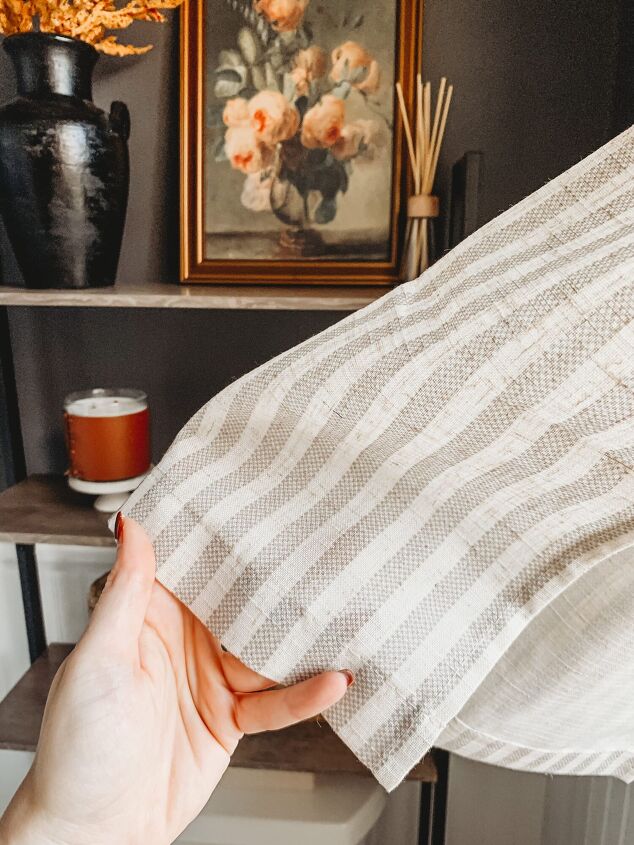
Curtains
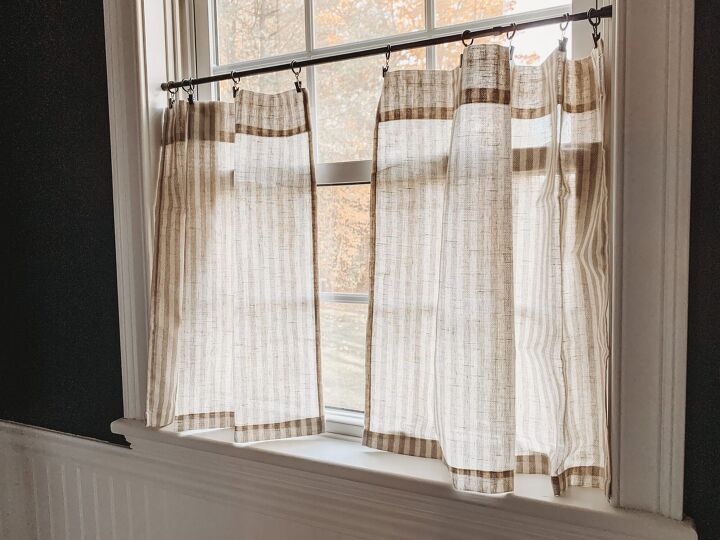
I hated to part with our previous curtains for sentimental reasons. My mother sewed them for the kitchen window in our previous house, but they were very sun faded. I found these sun-filtering ones on Amazon for a steal, and I love how the light shows all the rich texture of the linen. Rather than buy a new cafe rod, I spraypainted my existing one black and bought small curtain rings.
+PRO TIP: Curtain rings allow your drapery to move much easier versus using a rod pocket. Especially for cafe curtains, rings are a great choice.
And there you have it! Now that’s a powder room makeover — I absolutely love this space now!
Budget aside, if there’s an area of your home that’s been irking you or you’re just itching for change, I say do it. Even small changes like painting, adding artwork, or swapping out a fixture can make such an impact! Take the chance and you may surprise yourself. 🙂
Until next time, my babes!
FOLLOW ON THE GRAM and LTK.it: @threedaughtershome

Welcome to Three Daughters Home – a place where I share my love for making pretty things + decorating pretty spaces! If you’re looking for fun + affordable ways to upgrade your home or build memories, then I’m your girl! I share everything from décor I’m loving, to styling tips, and DIY projects big + small.
And if you think you want a little 1-on-1 help, I offer e-design as well! So let’s bring out your creative side and make your home feel lived in + loved in. ♡
- www.threedaughtershome.com


Comments
Join the conversation
Awesome
Your work is absolutely amazing. I love the change of your powder room. It was a builder grade bathroom to begin with but still beautiful and beautifully decorated. I am looking for an amazing brown paint. In one of your photos of your bathroom the paint looks brown. Was it. I’m not looking for a black, just a beautiful rich brown.