How to Do a Builder-Grade Bathroom Upgrade on a Budget

If you want bathroom update ideas, here are some budget-friendly ways to upgrade a builder-grade bathroom.These simple, inexpensive changes can elevate the look of your bathroom.
I will showcase a project where we used cost-effective and strategic ways to upgrade a lackluster bathroom into a space that combines style and function. I will also share with you a cost breakdown of these budget-friendly bathroom upgrades.
Table of contents
- Upgrading builder-grade finishes
- Color inspiration from fixed elements
- Upgrade 1: Paint
- Upgrade 2: Consider changing plumbing fixtures
- Upgrade 3: Consider switching out lighting
- Upgrade 4: Elevate the look of your vanity
- Upgrade 5: Switch out mirrors
- Upgrade 6: Add finishing touches
- Upgrade 7: Add textural accents in matching color
- Cost of the project

Upgrading builder-grade finishes
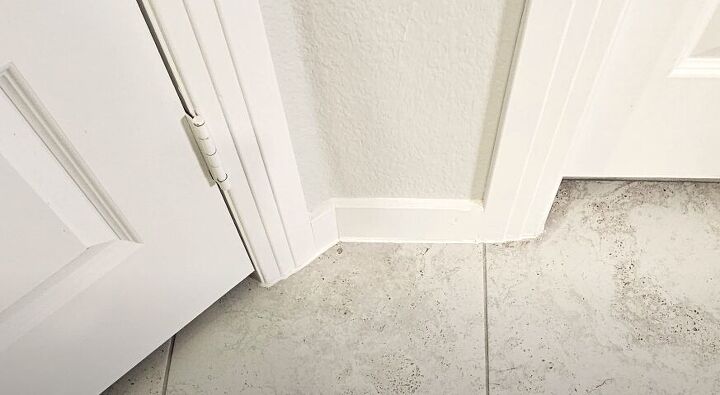
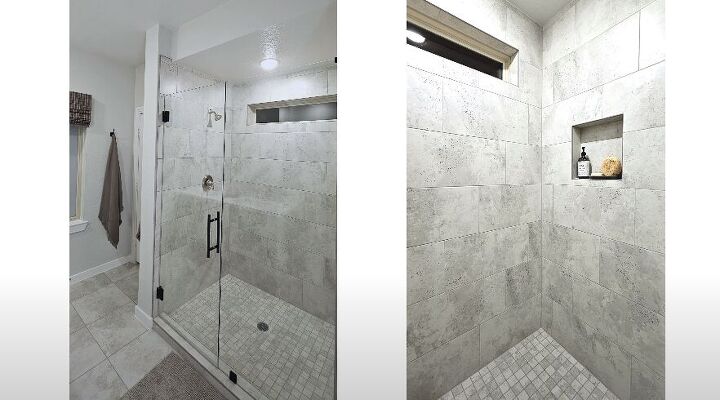
This bathroom makeover was in a three-year-old track home. It was 11 feet by 7 feet and had a good layout but needed more character and style. An issue with the shower led to a demo and rebuild from scratch, so the rest of the space was redone.
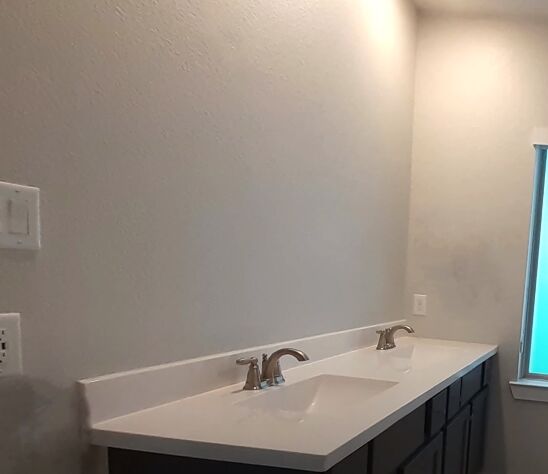
The huge builder-grade wall mirror, vanity, and fixtures made the overall space look very cold, bland, and uninviting. We explored what we could change to achieve a dramatic elegant look without breaking the bank.
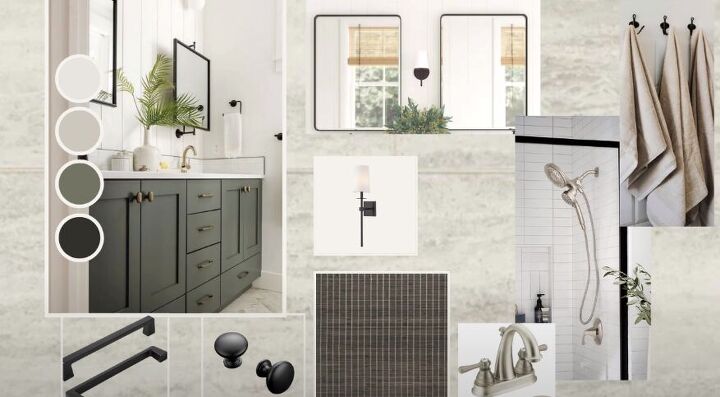
Color inspiration from fixed elements
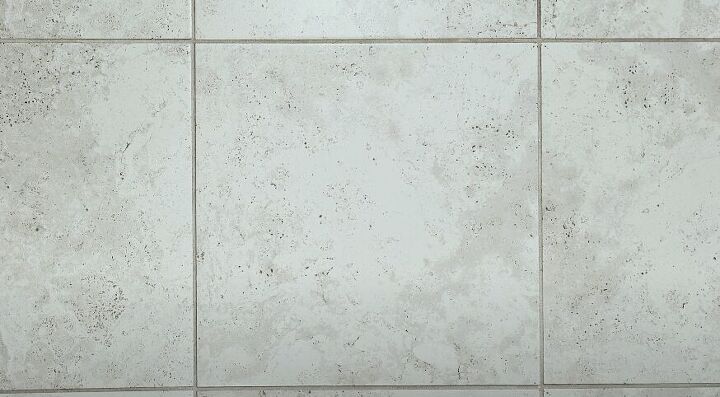
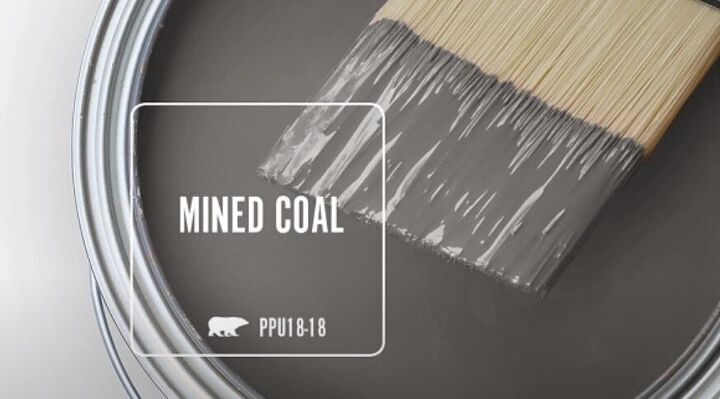
The existing large-scale light greenish-gray tile floors with subtle taupe and gray veining and dark gray specks served as the color inspiration for the upgrades.
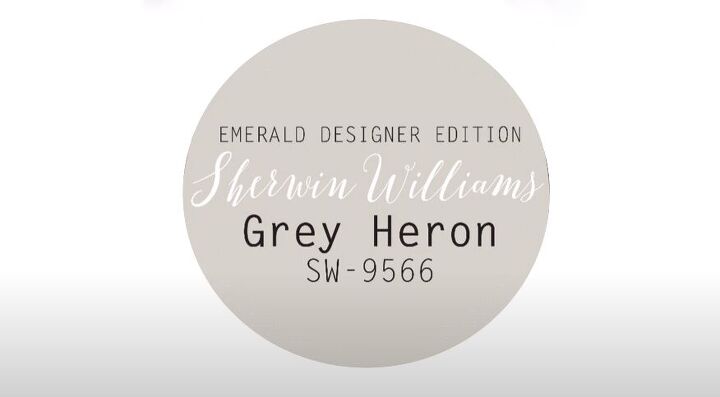
Upgrade 1: Paint
We gave the space a couple of coats of satin finish paint called Emerald Designer Edition Gray Heron from Sherwin-Williams. This is a soft light grayish paint with a violet undertone but in this space, it looks more greenish and complements the color of the floors.
Upgrade 2: Consider changing plumbing fixtures
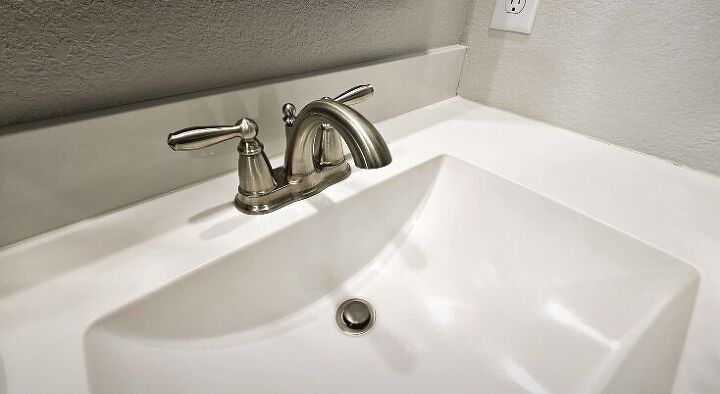
If this was an older home, we would have changed the faucets. But the newer bathroom fixtures in a warm satin nickel finish were a nice style so we kept them and decided to change other elements for greater impact.
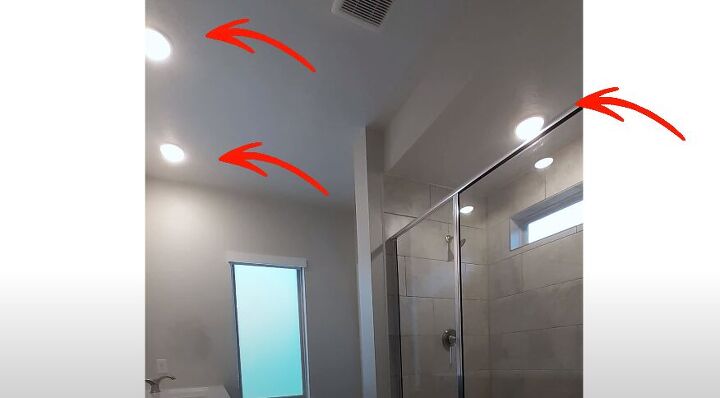
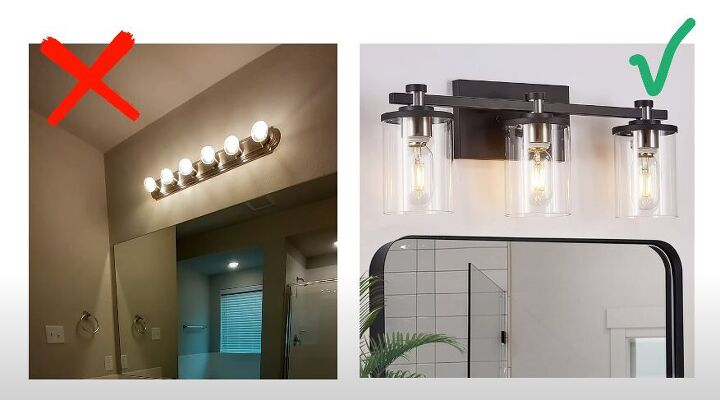
Upgrade 3: Consider switching out lighting
The existing overhead can lights in the shower and above the sink were in good condition and provided good lighting. There was no need to upgrade the lighting.
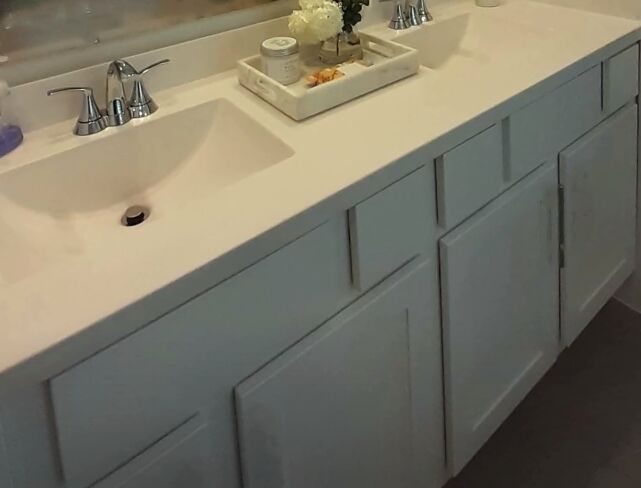
Upgrade 4: Elevate the look of your vanity
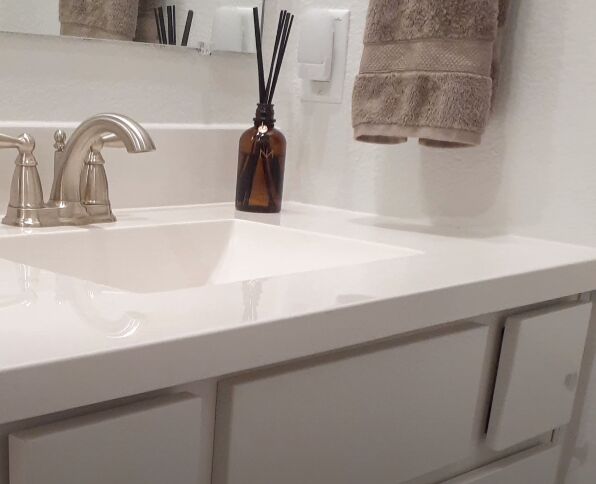
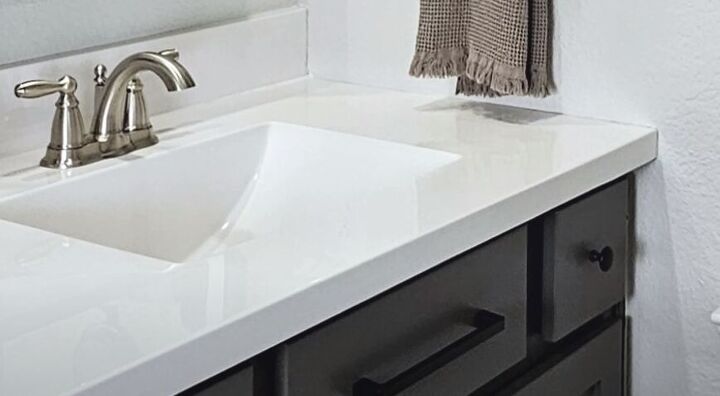
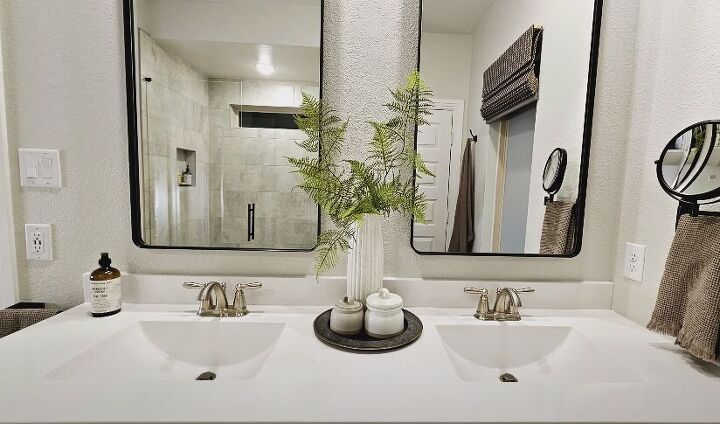
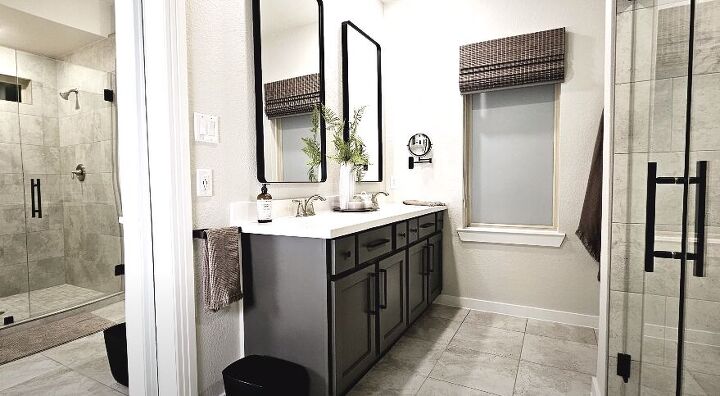
The white-on-white vanity and counters made the space look very sterile. The vanity counter was a creamy white cultured marble which we initially considered replacing with quartz. But since this was a tight budget, we decided to leave it as is.
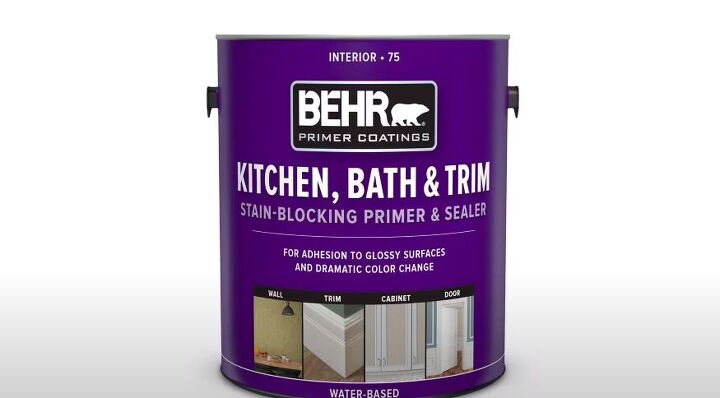
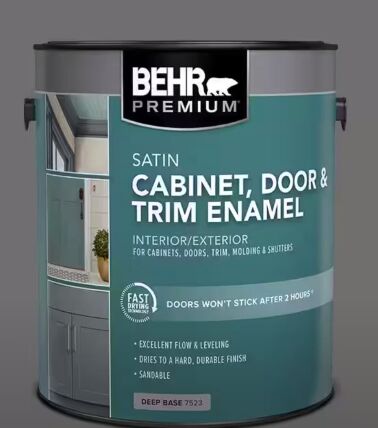
Instead, we focused on making a dramatic color change to the vanity cabinet for more contrast. We removed the doors and drawers and gave them light sanding, a coat of primer, and two coats of Behr satin enamel cabinet paint. We used a foam roller for a smoother finish.
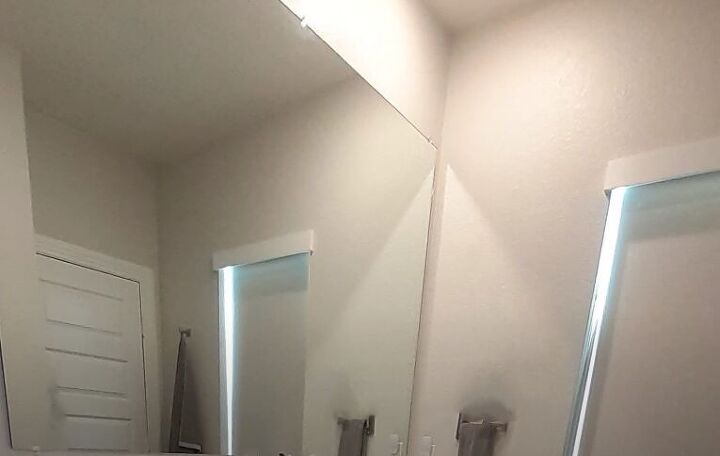
Upgrade 5: Switch out mirrors
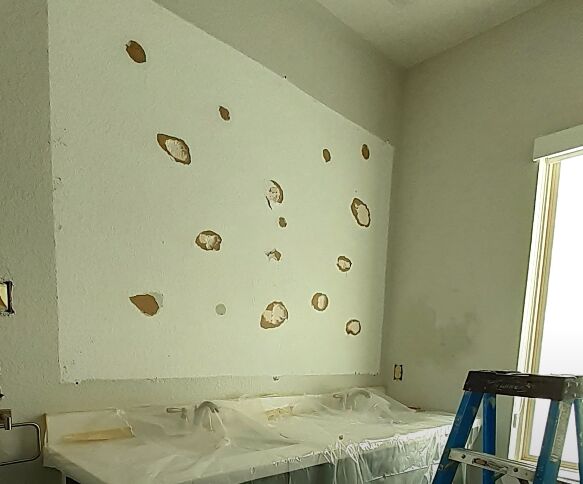
We took out the builder-grade mirror that was glued to the wall. It made the space very bland and cold. We took it down carefully so it wouldn’t break into little pieces. We patched damaged areas with spackle, primed, and repainted it. For a couple of hundred dollars, you can hire a handyman to handle this part of the project.
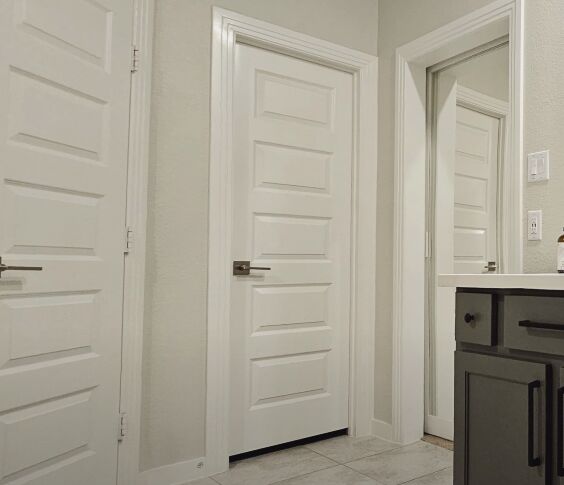
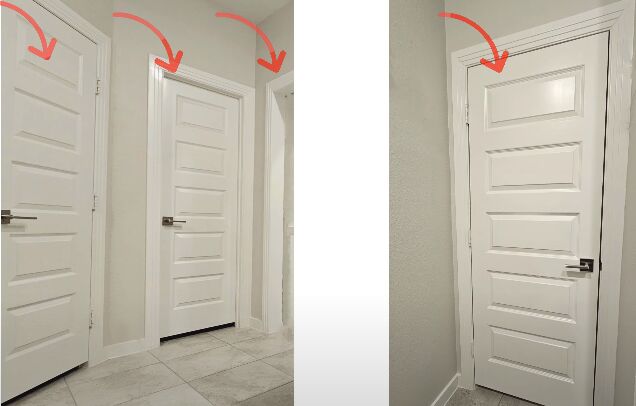
The space had four doors on three walls. To break up the sea of doors, we glued a mirror on the sliding door that leads into the master bedroom. It made the space look brighter and wider and made the space more functional.
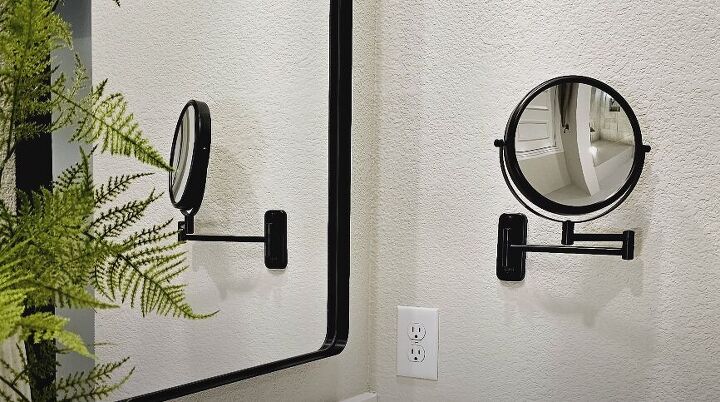
Upgrade 6: Add finishing touches in matching color
We added two tall black-framed mirrors with rounded corners that help soften all the hard angles in the space. They are centered on each sink so they align with the overhead lighting.
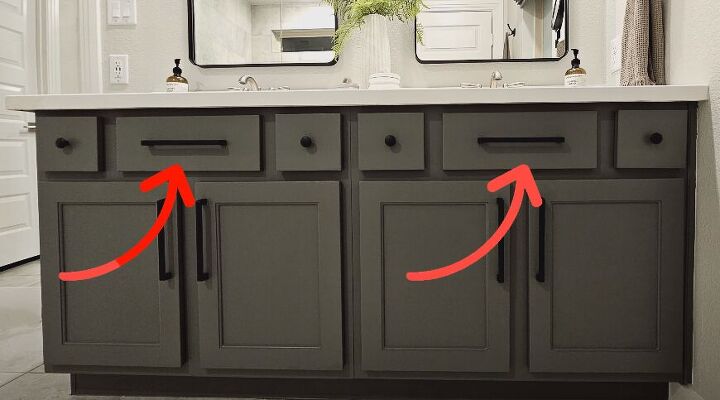
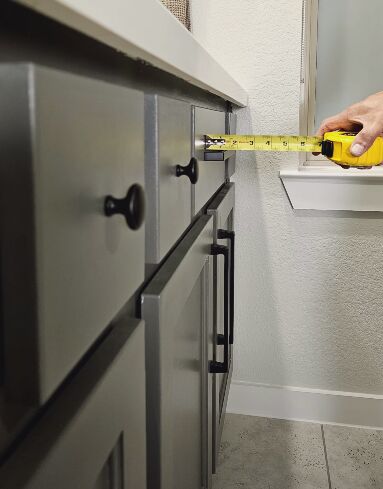
Hardware tip: If you are combining two types of hardware (knobs and pulls), make sure they are the same depth so one does not stick out more than the other. This also gives the vanity a more custom look.
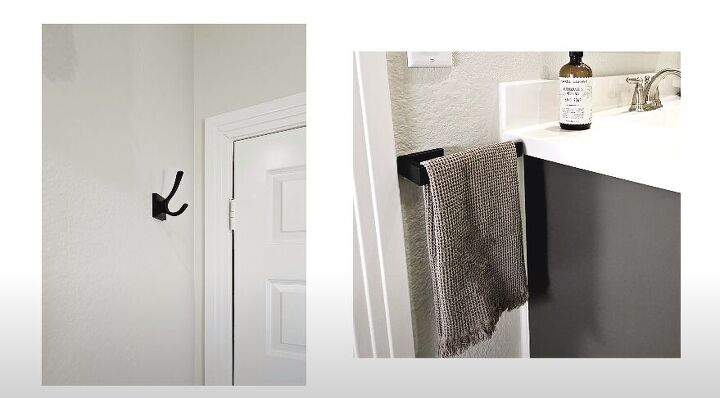
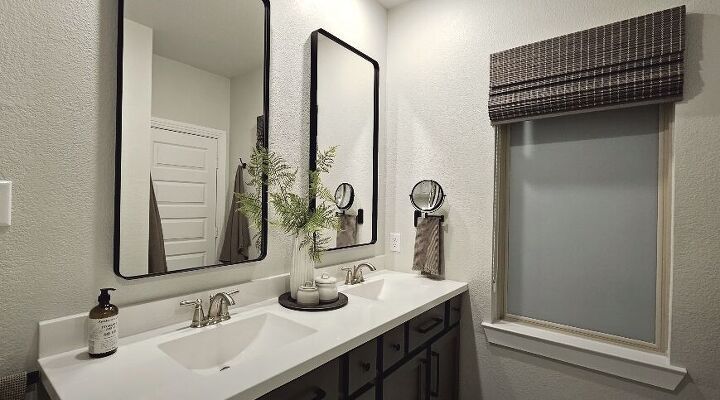
Upgrade 7: Add textural accents
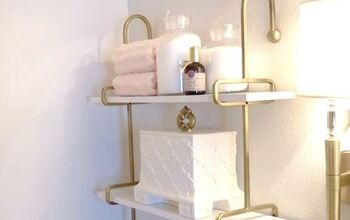
To soften the overall look and provide some relief from all the hard surfaces, we added a bamboo Roman shade, soft waffle towels, and matching bath mats.
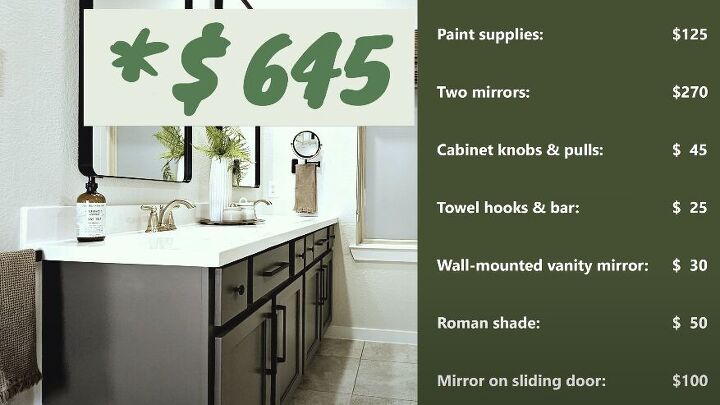
Cost of the project
We completed this project for $645. For under $650, we were able to totally transform the look of this side of the bathroom.
This doesn’t include the shower renovation that we were forced to do during the first part of this project.
Bathroom upgrade
This bathroom upgrade project was proof that with some easy changes, some time, and effort, you can transform a space into a beautiful designer-looking space on a budget.
I hope you are inspired by these changes for your own bathroom redo. Let me know in the comments which of these changes you believe made the biggest impact in elevating the look of this bathroom.
Disclaimer: I may receive a small affiliate commission from purchases made via Amazon links in this article but at no cost to you.
Amazon shopping list links:
- Foam paint roller kit: https://amzn.to/3SD7lHu
- Lighting Wall Sconce: https://amzn.to/3UlCeRZ
- 3-Light Bathroom Light Fixtures: https://amzn.to/3UmXeaP
- Mirrors 24 x 48: https://amzn.to/46sN7V8
- Cabinet pulls: https://amzn.to/3HK4Lcn
- Cabinet Knobs: https://amzn.to/3w7sX5K
- 8” Hand Towel Bar: https://amzn.to/3HHbrbh
- Towel hook: https://amzn.to/3SrSAFQ
- Wall-mounted makeup mirror: https://amzn.to/3UkoCGB
- Roman Shade: https://amzn.to/3w7sJeU
- Waffle Towel set: https://amzn.to/3w0WIVV
- Bath Rug: https://amzn.to/48IaDP4


Comments
Join the conversation