My Patio Makeover: Cleaning, Organizing & Decorating

Today we're going to be talking about cleaning, organizing, and decorating our patio. As I walk you through our own patio makeover process, you will discover some really practical patio makeover ideas that you can use to start your own project outdoors.

This is our patio area. We didn't use it much, so it became a bit of a dumping ground over time.

Since I wanted to move these bins off the patio area, my first step was to create space for one of these bins under the deck stairs.

Before I could move the bin over, there was definitely some cleaning and organizing I needed to do.


First, I needed to clear out the space and then add some more rock, particularly under the stairs. That's where most of the leaves and debris collected.
Next, I went online and found this firewood rack that fit perfectly under the stairs. It took my husband less than fifteen minutes to put it together. The design is simple but sturdy.

Adding this rack allowed me to move the wood off of the plastic shelving unit I like to call the leaning tower of Trisha. Those plastic shelves had to go.

The storage bin replaced the shelves and now the space looks great. The bin also doubles as my potting table and I love it.

Next, I needed to split this hosta. I figured I'd use this hosta to fill in this little empty flower bed.

These plants are the best investment you can make in your garden. You can split a hosta year after year and spread them all around your garden.

Next, I wanted to power wash the sidewalk and patio area. I wanted the space to look and feel clean. That meant getting rid of years of old dirt and grime.

My son helped me power wash the walkway while my daughter helped me with the patio.

I went back and mulched the surrounding garden beds after the power washing was done.

Next, it was time to breathe new life into the old patio furniture. I spray-painted all the tables and chairs. The spray paint made the furniture look like new. Also, make sure to wear a mask. I had one on but I forgot to put it back on after running into the house.

With the cleaning done, it was now time to move on to the decorating. I found these outdoor garden flags online as well as these magnetic poster hangers.

I wanted to add artwork to the brick walls, and I knew these would do the trick.

To cover up the unsightly basement window on the other side, I added another garden flag plus a super easy-to-install shelving unit.

These shelves will hold cups and other decorative elements when I turn this area into a beverage center.

Next, it was time for my husband and I to carry over this second storage bin. You'll see later how this bin plays double duty.

Here's one of my favorite parts, rolling out the area rugs. I selected this outdoor rug because of the bold, bright colors. Since this patio is under the deck, the patio can get a little dark, unlike the deck that is in full sun all day long. So this rug offered bright bold colors in a pattern that livened up the space day or night.

I used two rugs this time because this patio is thirty feet long, so I wanted the bright colors to continue all the way through.

Next, we brought all of the furniture back in. It sat outside in the hot sun for a couple of days so that the paint could fully dry.

We've had these chair cushions for a couple of years now. The colors of the cushions were actually the inspiration for this entire space.

Since we'll likely need to change the cushions out in a couple of years, the different colors in the area rug will allow us some options for future cushion colors.

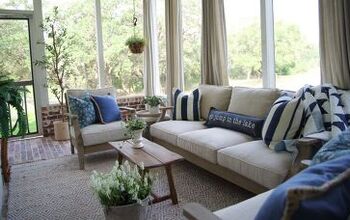
The patio area now has three fully functioning seating areas. The dining table and chairs, the bistro seating sitting on the side, and the lounge seating area.

And let me just add that I love this coffee table in the lounge area because it also doubles as a fire pit where we love to roast marshmallows.

Next, it's time for the finishing touches. I'm setting the table with a table set that I purchased from Pier 1 years ago.

I am so happy I held on to this set. It works perfectly in this space.

A few napkins, some fresh flowers, candles, and flatware complete this table setting.

I can't forget my little bistro seating area. Some lights and artificial flowers fit perfectly here.

Back over in the lounge seating area, I wanted to add a few pops of color to further tie together the area rugs and chair cushions. I used these throw pillows to do the trick. I actually use these pillows all year long. I simply change out the pillowcases to coordinate with the seasons. The pillows also offer great back support. You have to love that.

I had the most fun with this area. Right from the beginning, I envisioned this as a beverage center for our guests.

It'll hold the cups, candles, decorative vases, and yes, real flowers from my daughter's watering can. I love this space, and I've loved this project.

Here is how I arranged the beverage center on the bin I moved down below.

Time for some before and afters. Here is the before.

And the after.

Before

After

Before

After

Lastly, the gorgeous nighttime view for you to enjoy.
Patio makeovers on a budget
A patio makeover doesn’t have to stretch your budget past its breaking point. With the right tips and tricks, patio makeovers on a budget are a very real thing. So get out there and spruce up your backyard as well.
What would you love to see on your patio at home? Share your ideas with others in the comment section that follows.


Comments
Join the conversation